Engineers convey ideas through drawings and sketches. When sketching rectangular objects in orthographic or isometric views, it is necessary to be able to draw parallel lines. Additionally, for isometric views, the lines are offset 30˚ from the horizontal. I wanted to make a tool that would help me draw parallel lines and 30˚ angles to be able to make sketches quicker and more accurately.
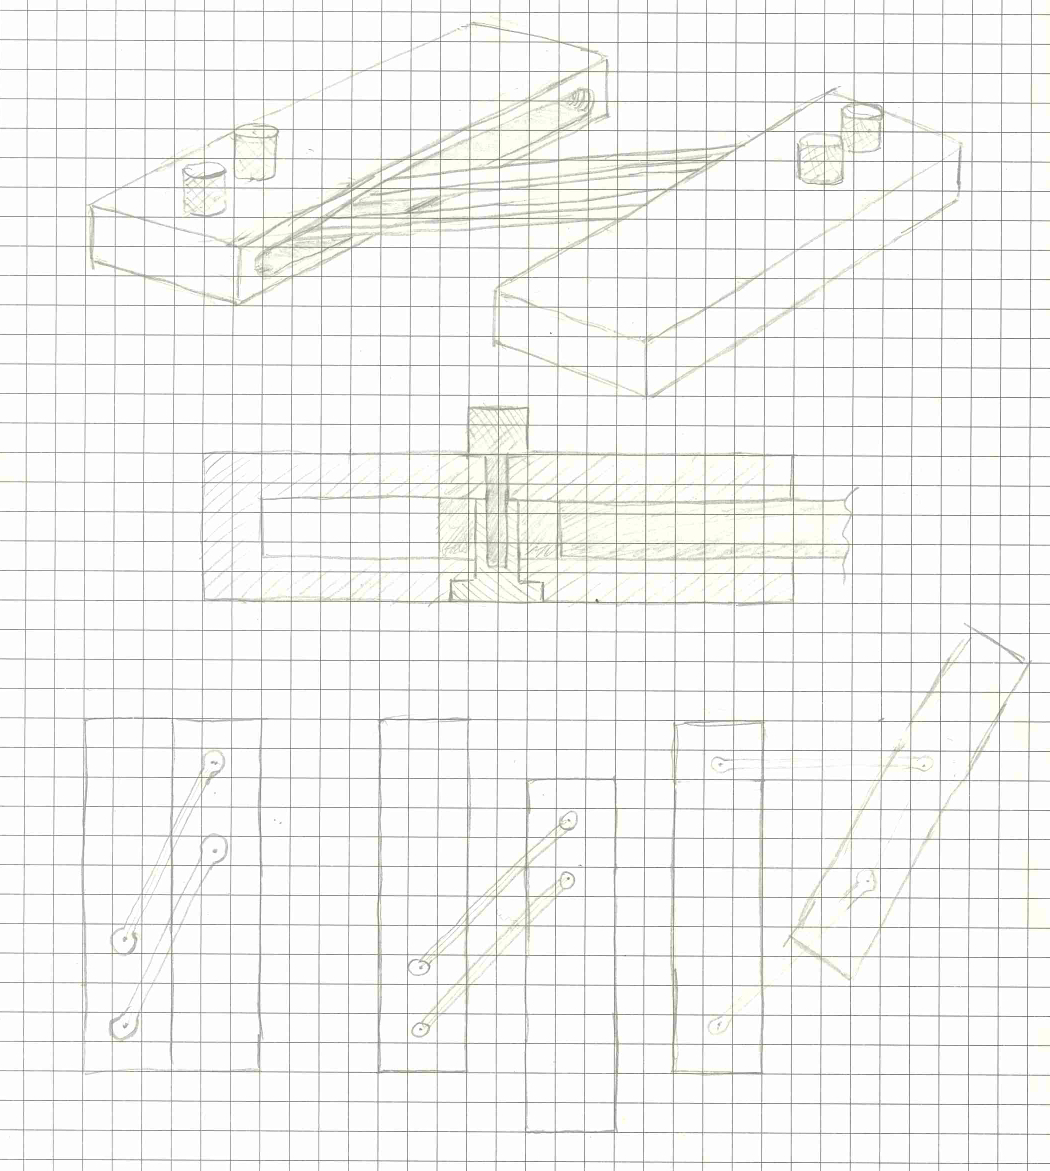
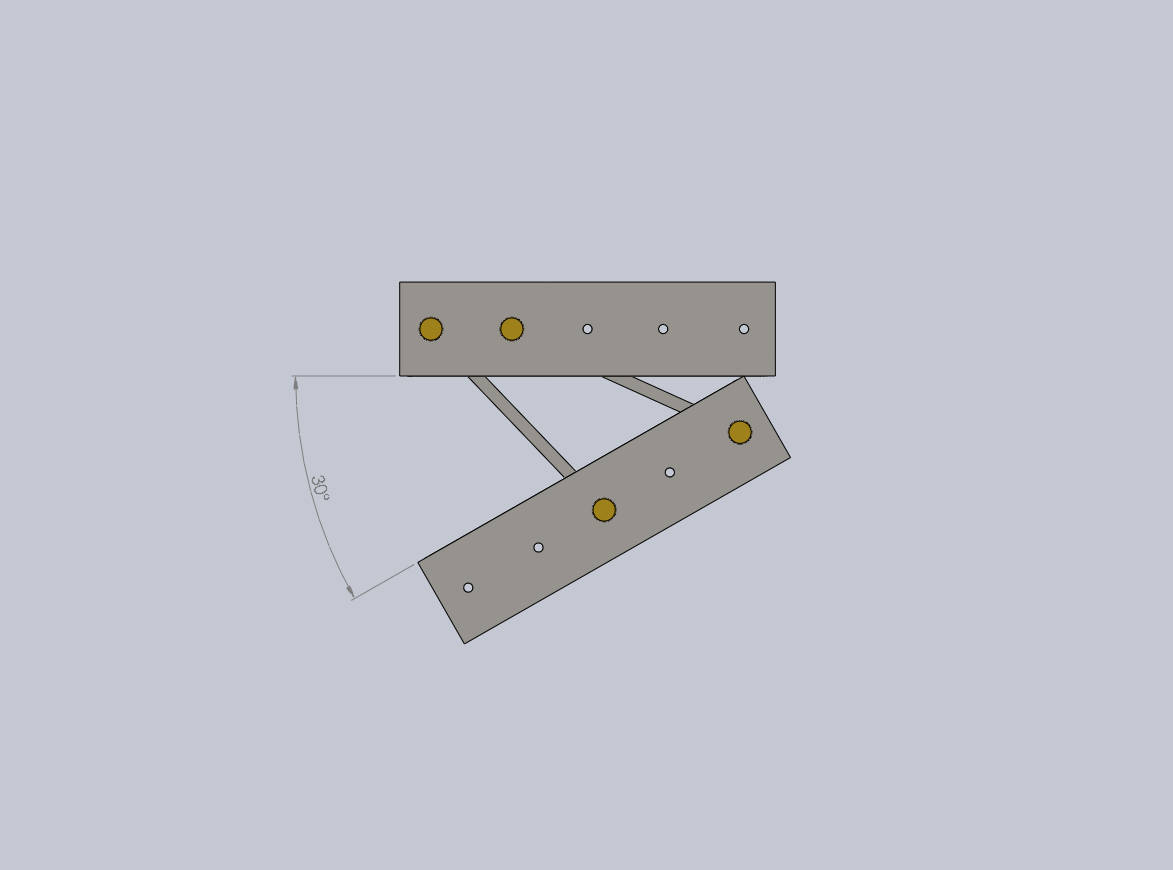
My initial conceptual idea was to have two bars connected by two rods to form a parallelogram linkage. This way, one bar could 'follow' the original line, while the other [parallel] bar could be extended and a parallel line could be traced along the edge of the bar at any desired distance.
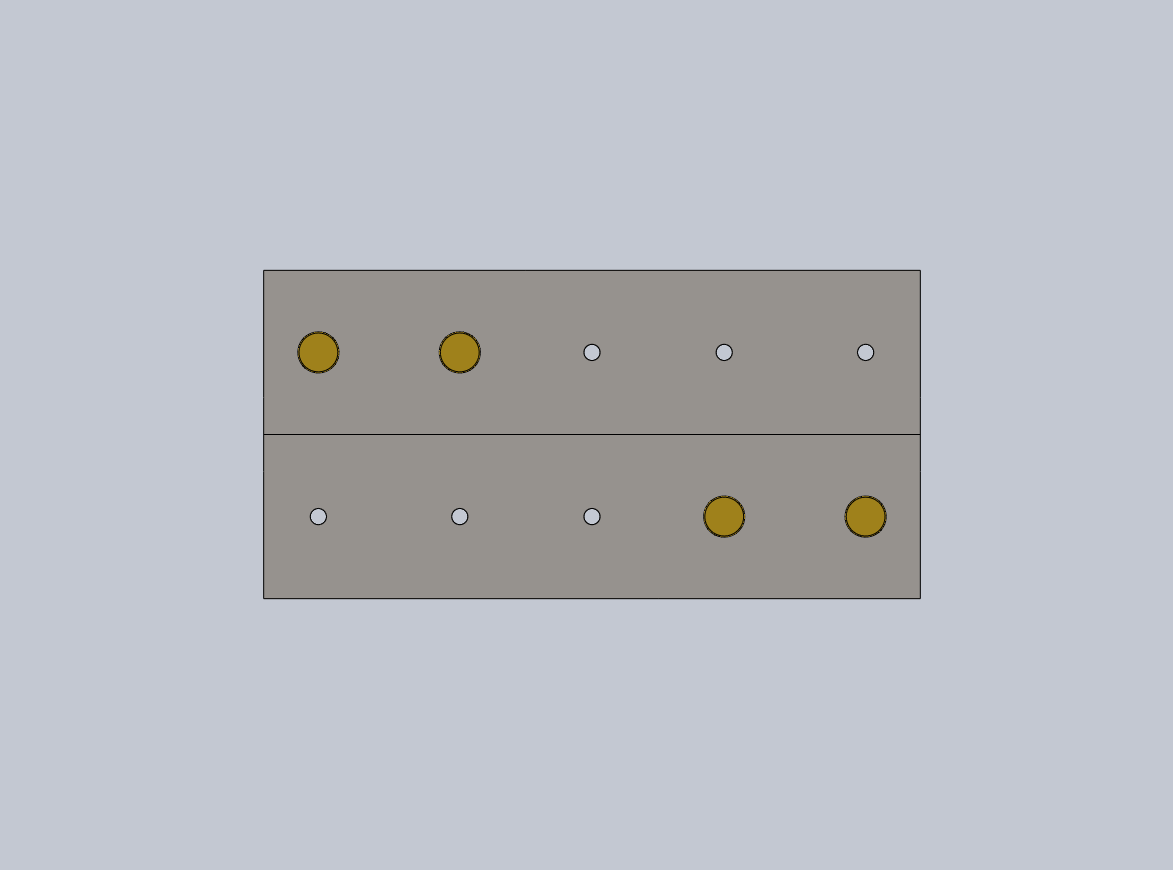
Making the 30˚ angle was more tricky. My original thought was to have different sized rods that could be swapped out to make different angles, but I thought there was probably a simpler and more elegant way to do it. I eventually decided to add extra holes as alternate positions for the rods. In their alternate positions the rods are no longer parallel, and thus the angle between the bars can change. The freedom of motion of the bars is limited by their interference, and so by adjusting the geometries of the parts, a 30˚ can be obtained when the bars are touching each other.
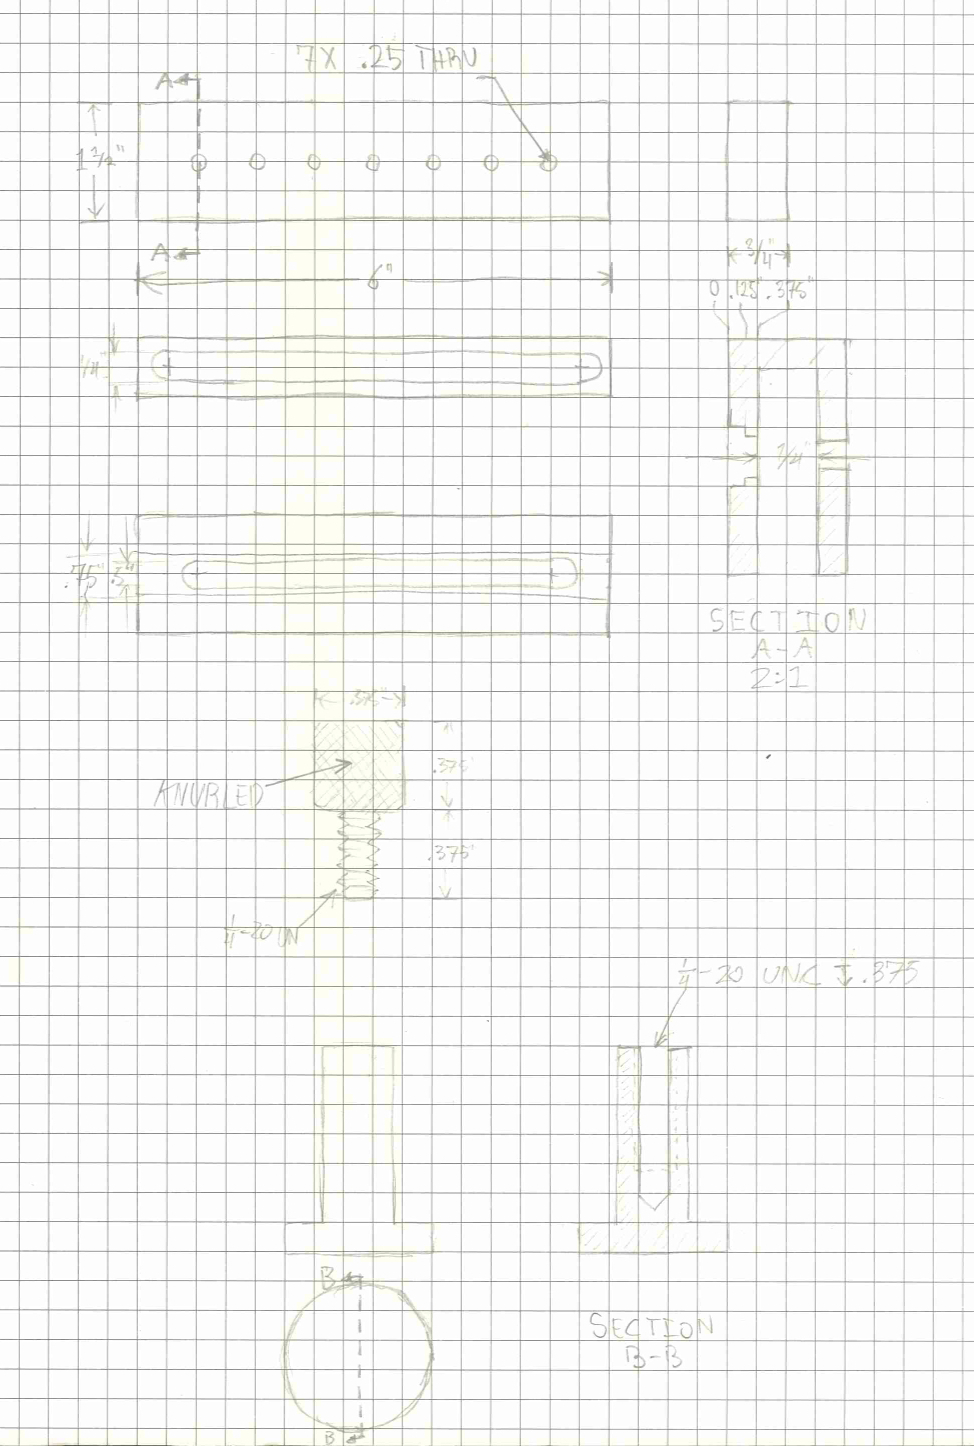
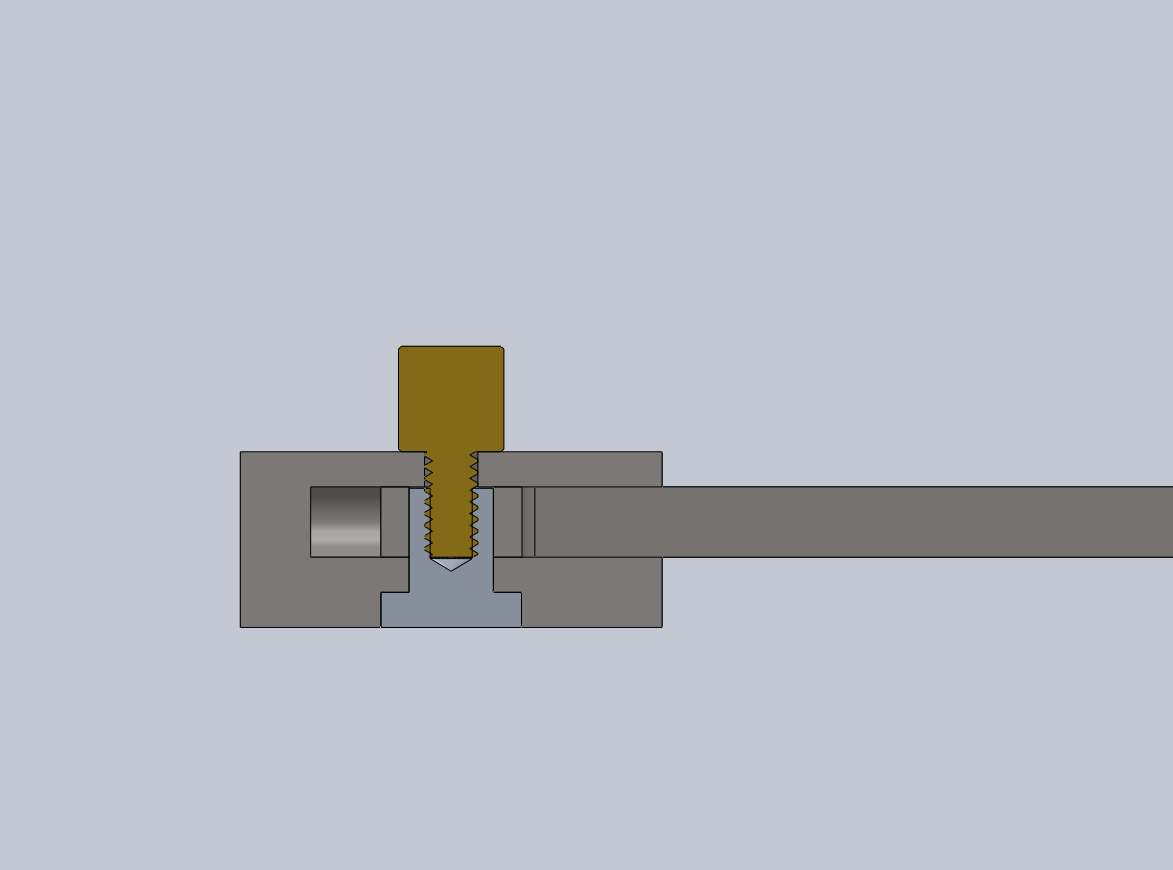
The last element of the design was how all the pieces fit together. I decided to use knurled brass knobs that threaded into a nut. The nut head fits into a channel, and the shank of the nut slides in a slot. The rod end fits around the nut, and the length of the rod is contained within a pocket in the bar. Tightening the knob presses the bar against the rod to lock it in place. If the knob is unscrewed completely, the rod end can be moved to a different hole to get the 30˚ angle.
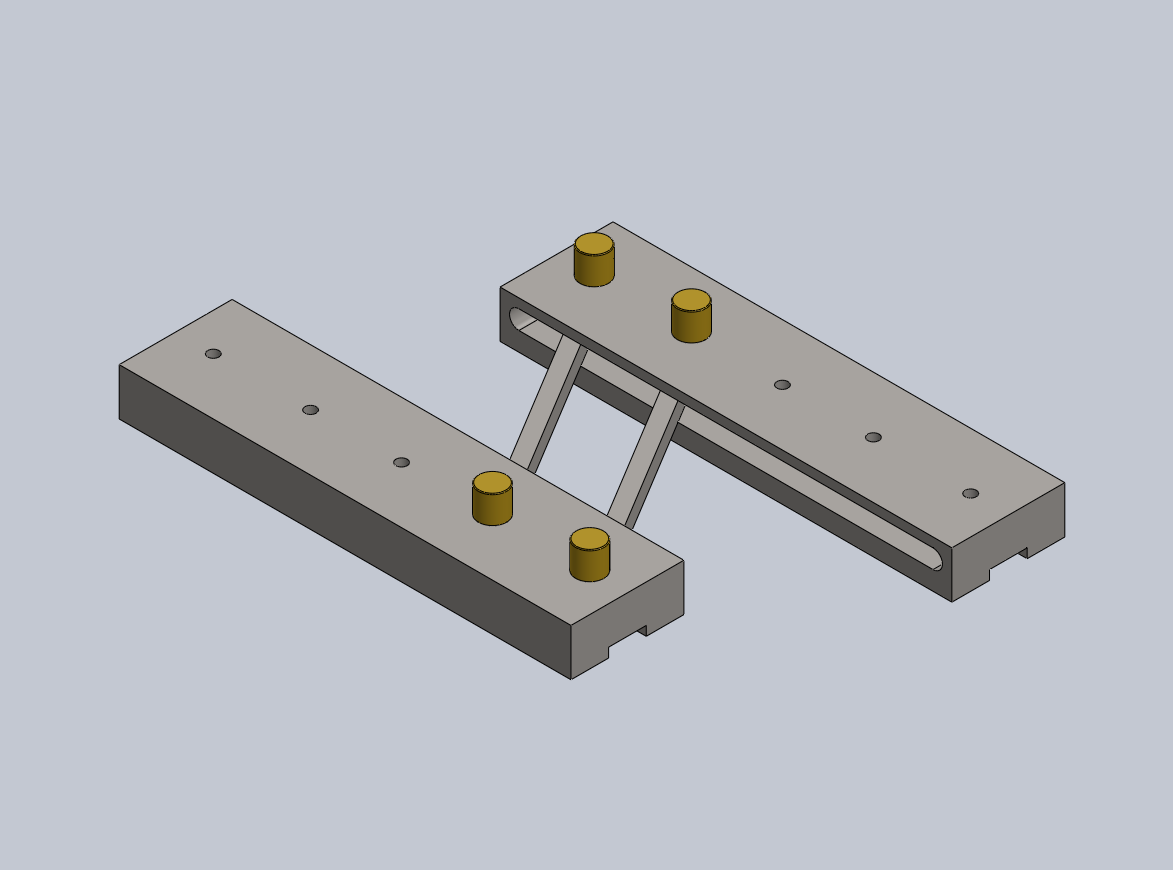
This is the first version of the design. I'm still not sure what materials to use for the different parts. I really like the look of knurled brass knobs and rods, but I'll need to make sure they are strong enough. I originally planned to use 304 Stainless Steel for the bars for longevity and cost, but the locking function depends on the the ability of the bar to deflect under the force of the knob and press against the rod.