• Portfolio
  • Aviation
  • Blog
  • About
Menu

David S Miller

  • Portfolio
  • Aviation
  • Blog
  • About
 Spot drilling the hole

Spot drilling the hole

 Setting the 15 deg angle

Setting the 15 deg angle

 Setting the height of the cut

Setting the height of the cut

 I dimensioned the part based on how it would be fixed to make setting the height and depth easier

I dimensioned the part based on how it would be fixed to make setting the height and depth easier

 Making sure the fixture for the milling cutter wont crash into the work

Making sure the fixture for the milling cutter wont crash into the work

 Punching through some card stock

Punching through some card stock

 I should have made the punch longer as the circle gets stuck in the die

I should have made the punch longer as the circle gets stuck in the die

 It's a clean cut at least. I used a pencil to get it out

It's a clean cut at least. I used a pencil to get it out

 The finished piece with the drawing

The finished piece with the drawing

 Spot drilling the hole  Setting the 15 deg angle  Setting the height of the cut  I dimensioned the part based on how it would be fixed to make setting the height and depth easier  Making sure the fixture for the milling cutter wont crash into the work  Punching through some card stock  I should have made the punch longer as the circle gets stuck in the die  It's a clean cut at least. I used a pencil to get it out  The finished piece with the drawing

Illusionist's Heart Locket Pt. 6

May 10, 2016

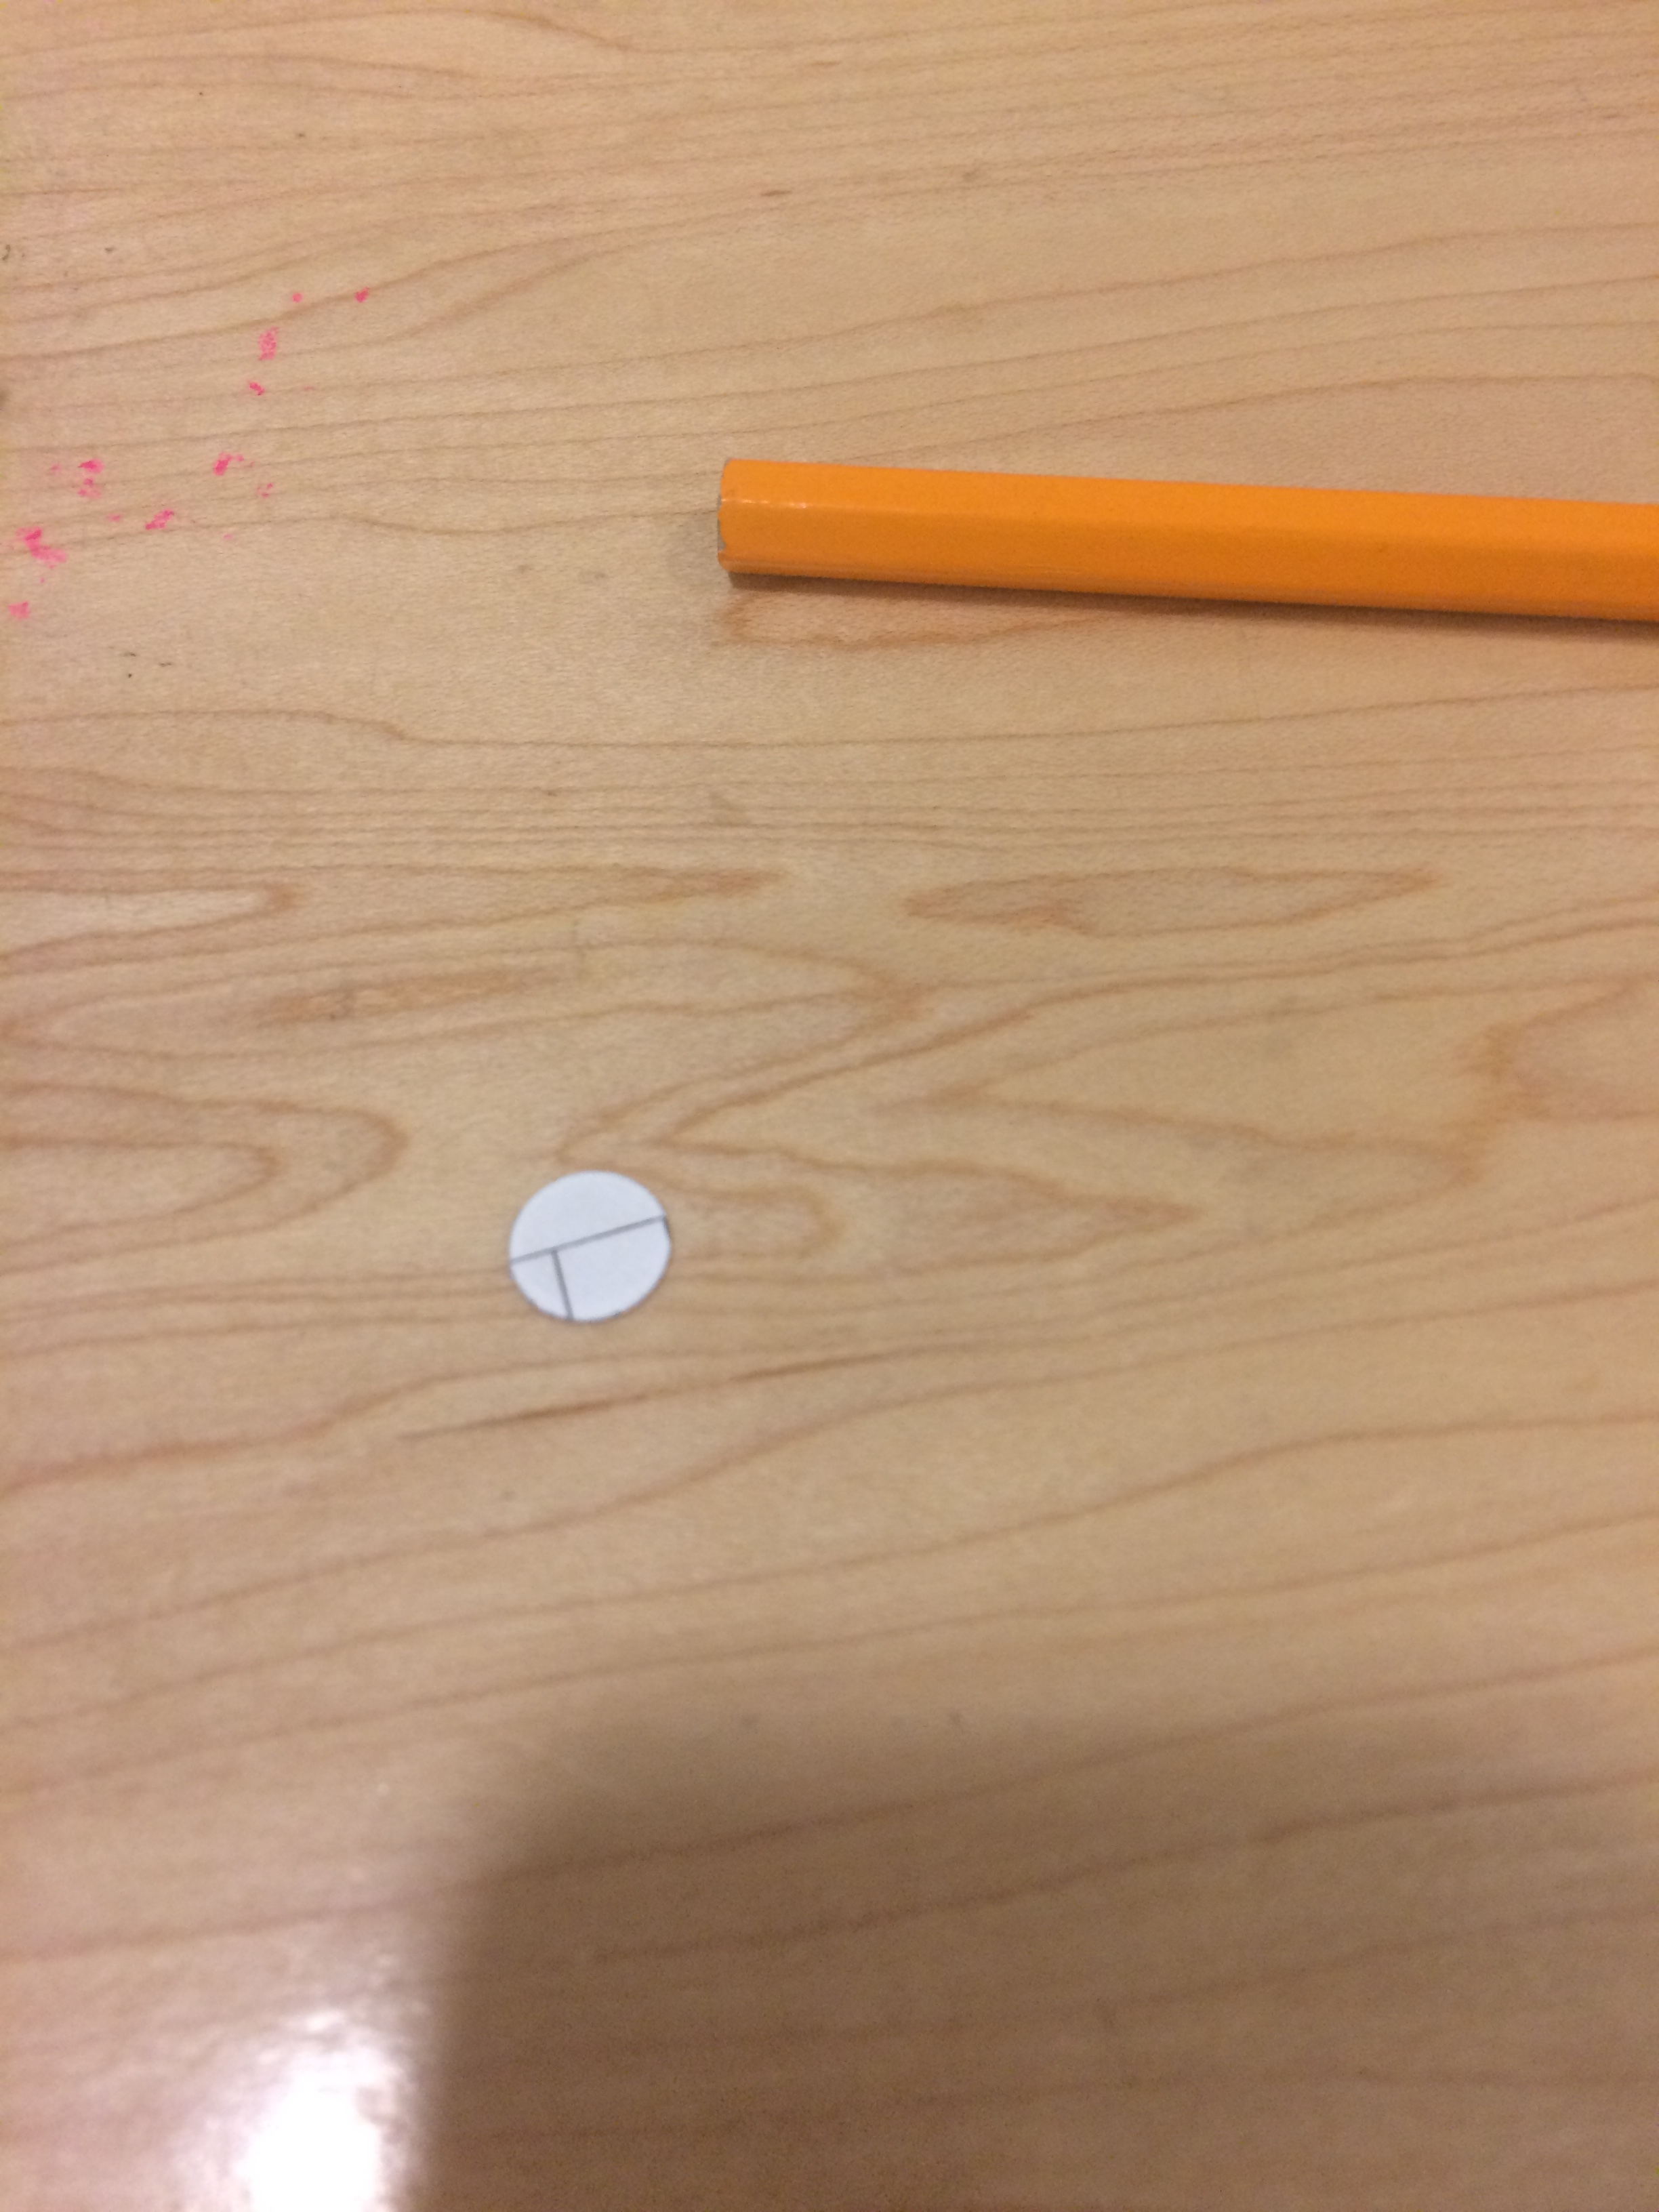
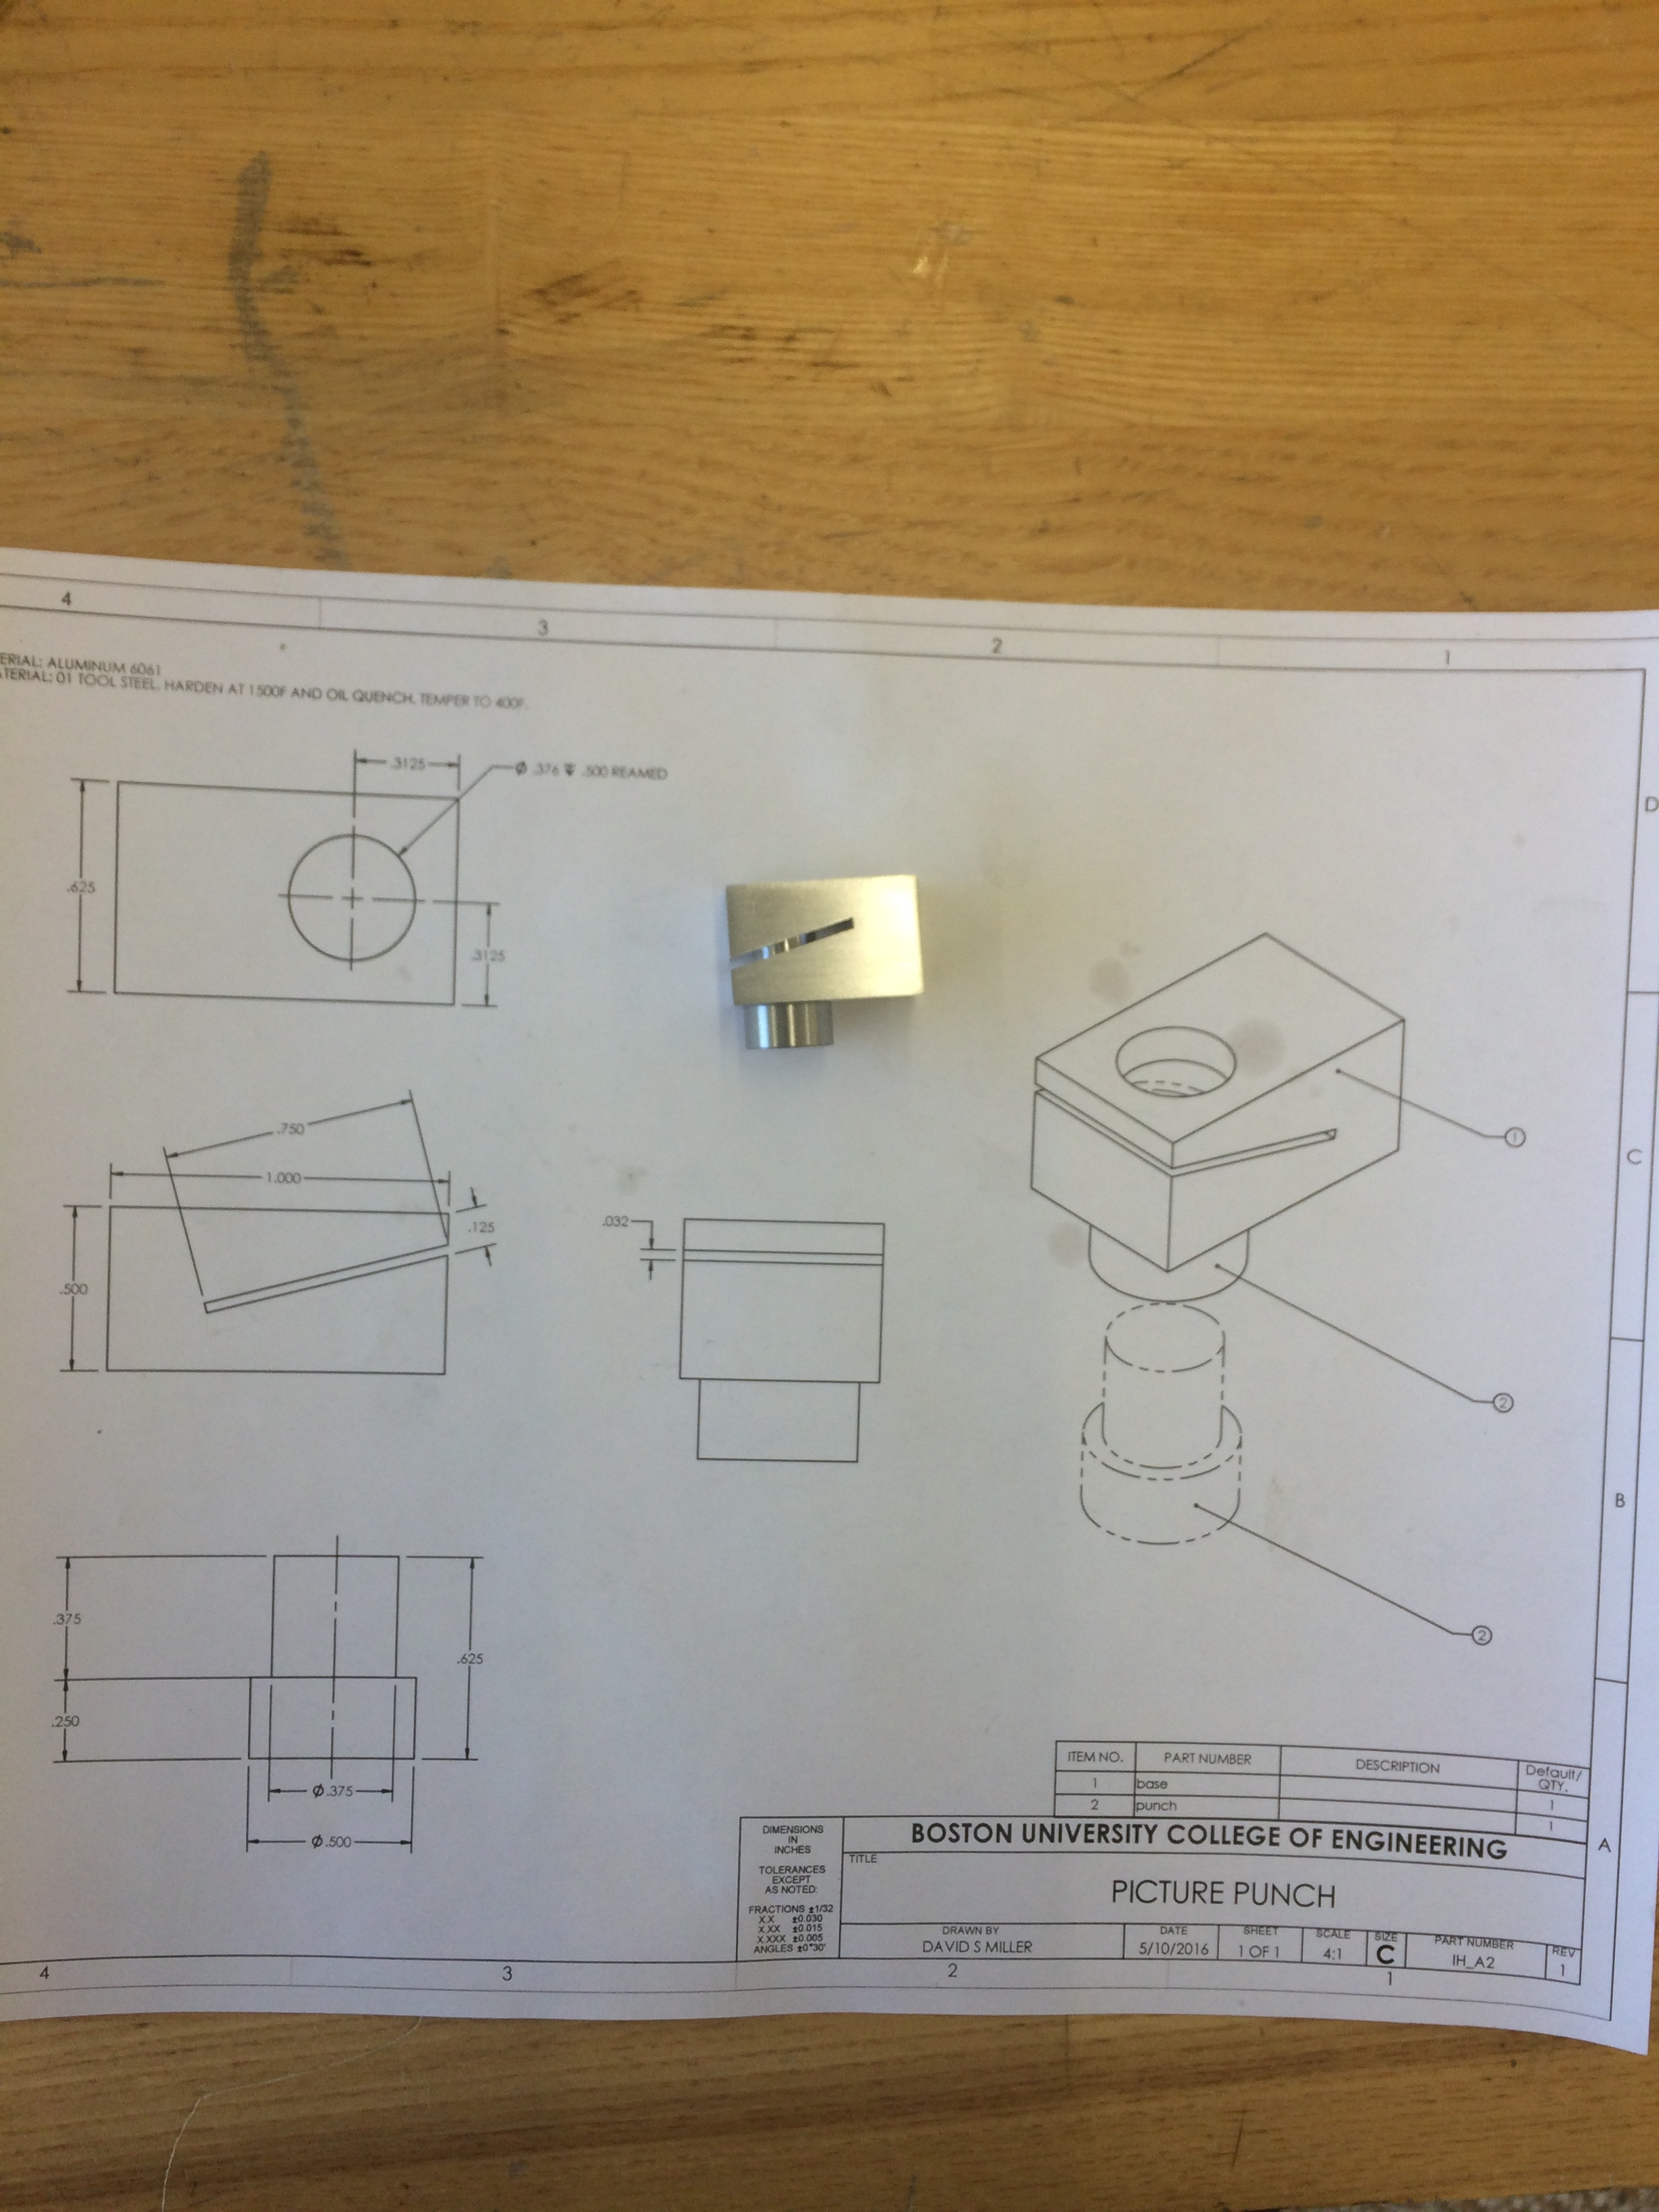
Today I made another piece for the Illusionist's Heart Locket. Now that classes are over I have free time to work on personal projects, which is a relaxing way to end the school year. The purpose of this piece is to punch the pictures that will go into the locket at the correct size. A regular hole punch can't be used as it is much too small. Instead I made a custom hole punch to get the correct size photo.
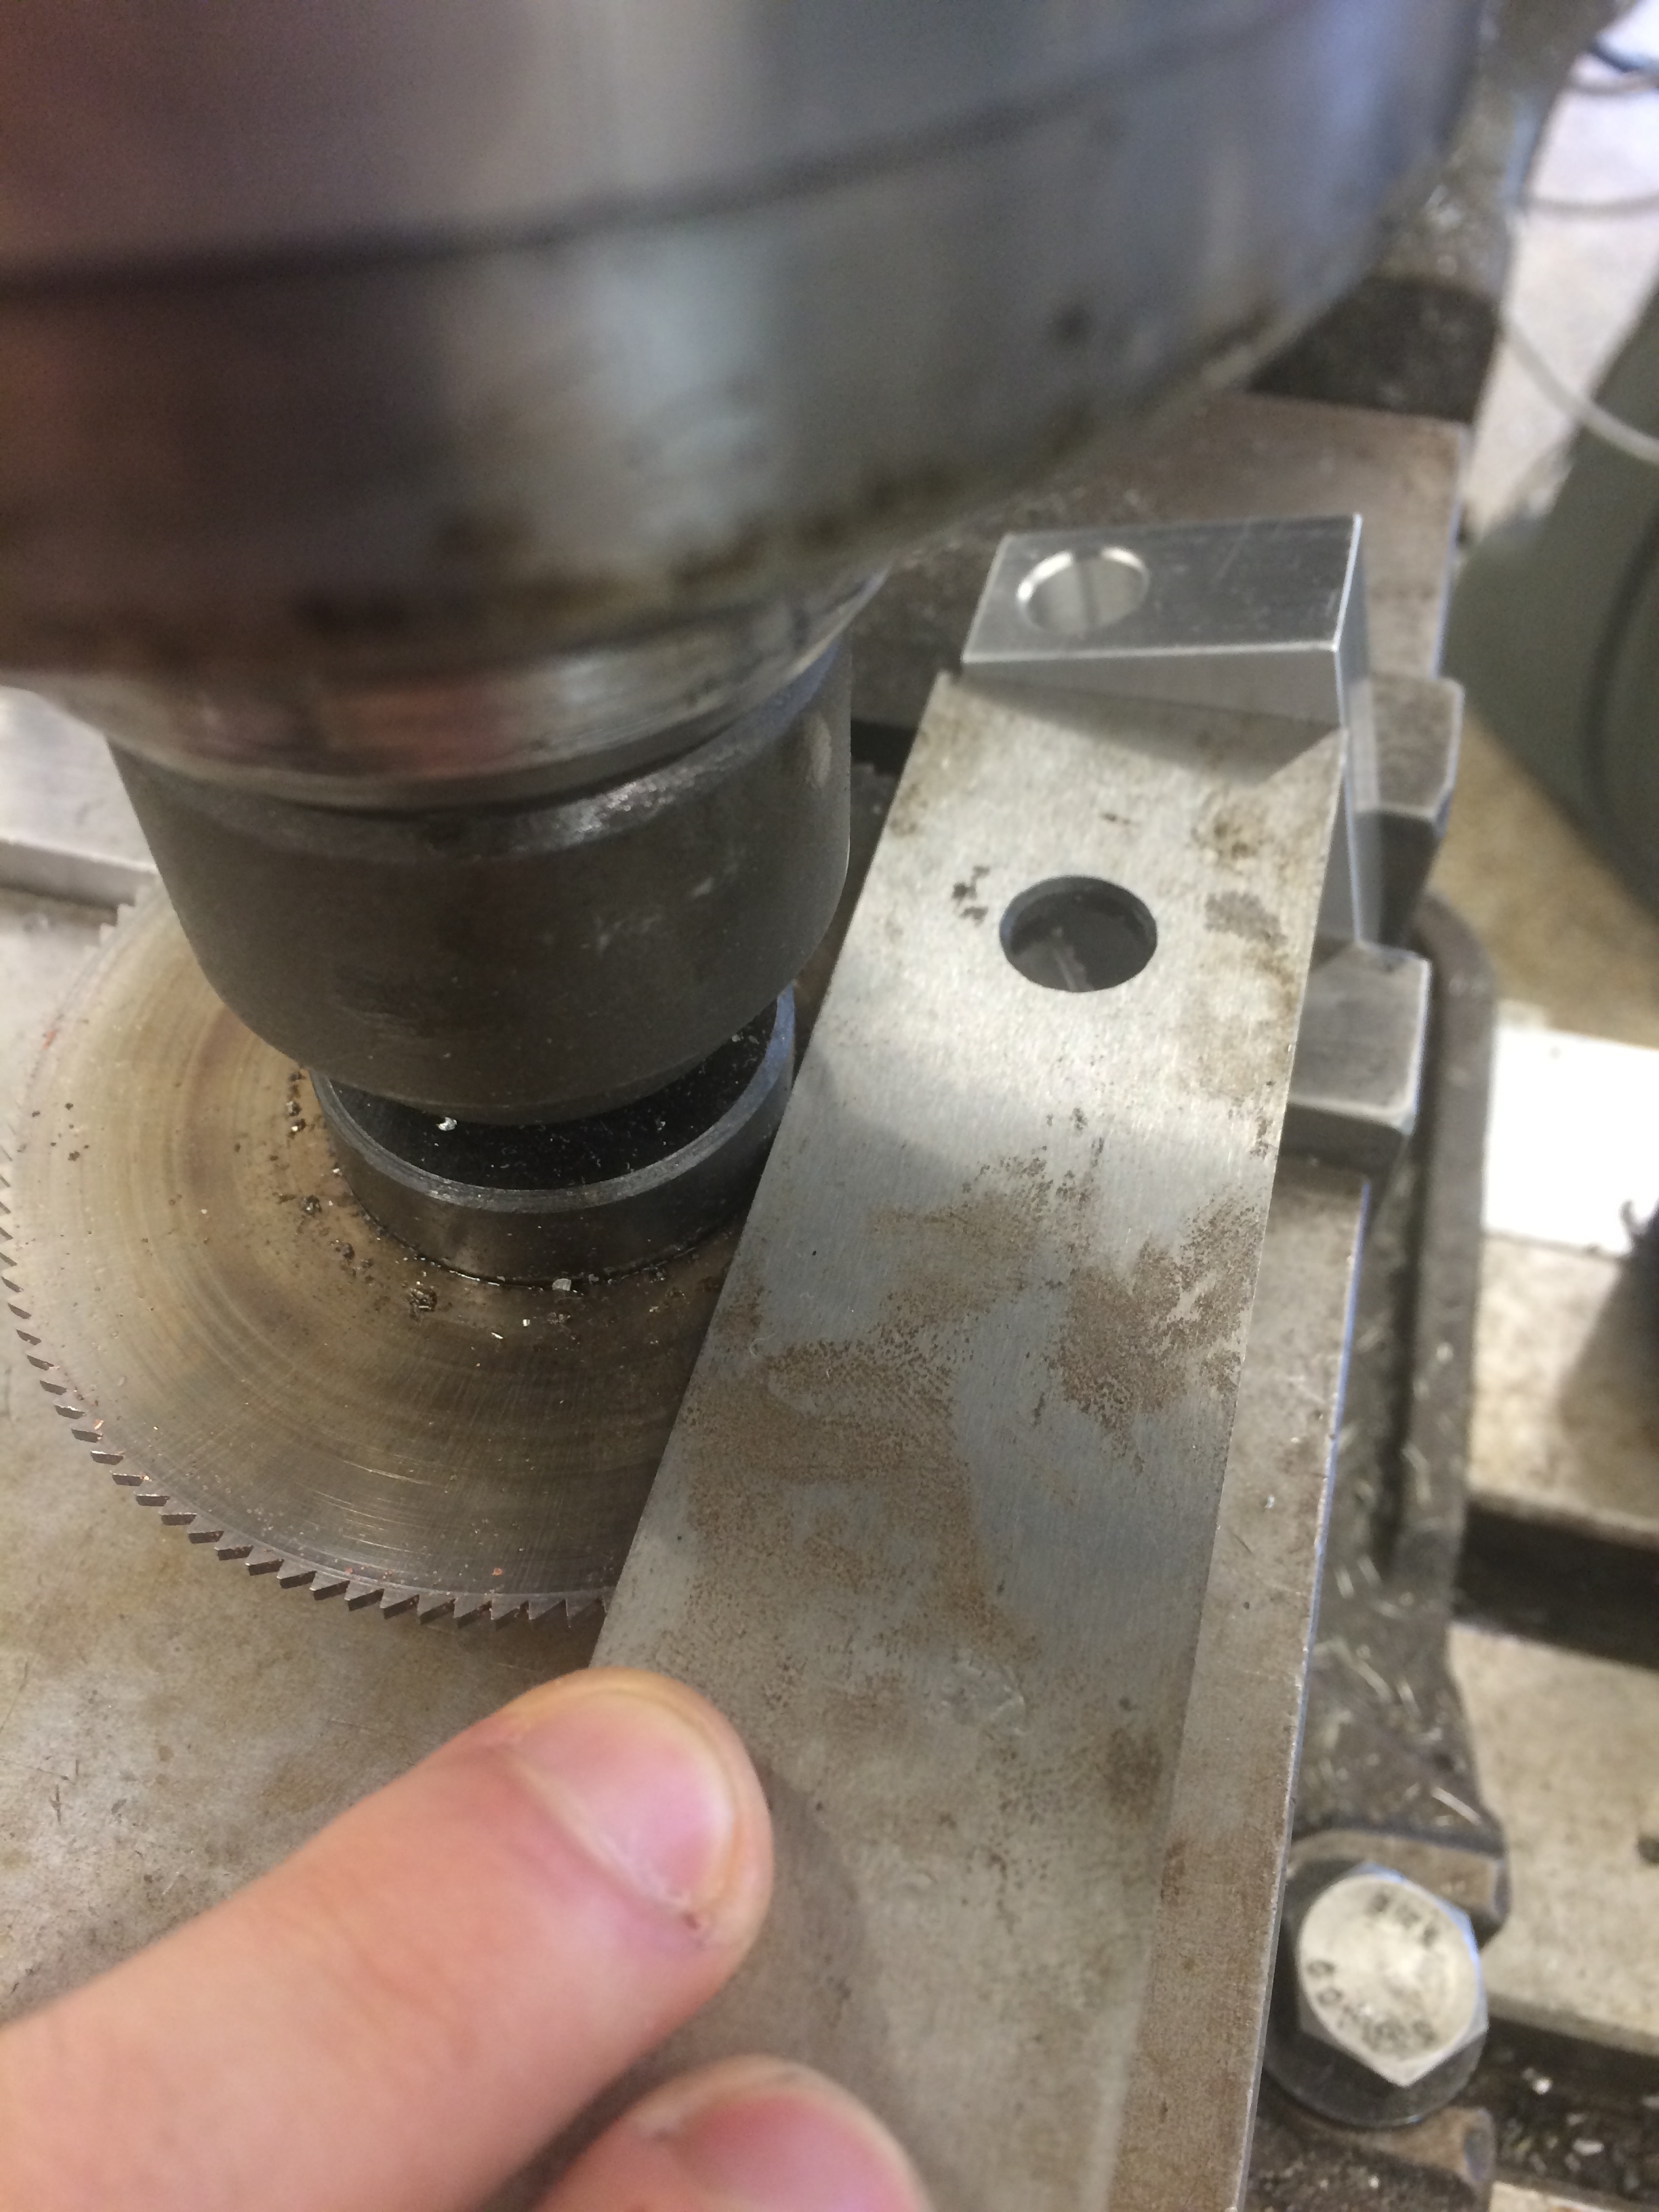
 

The Die

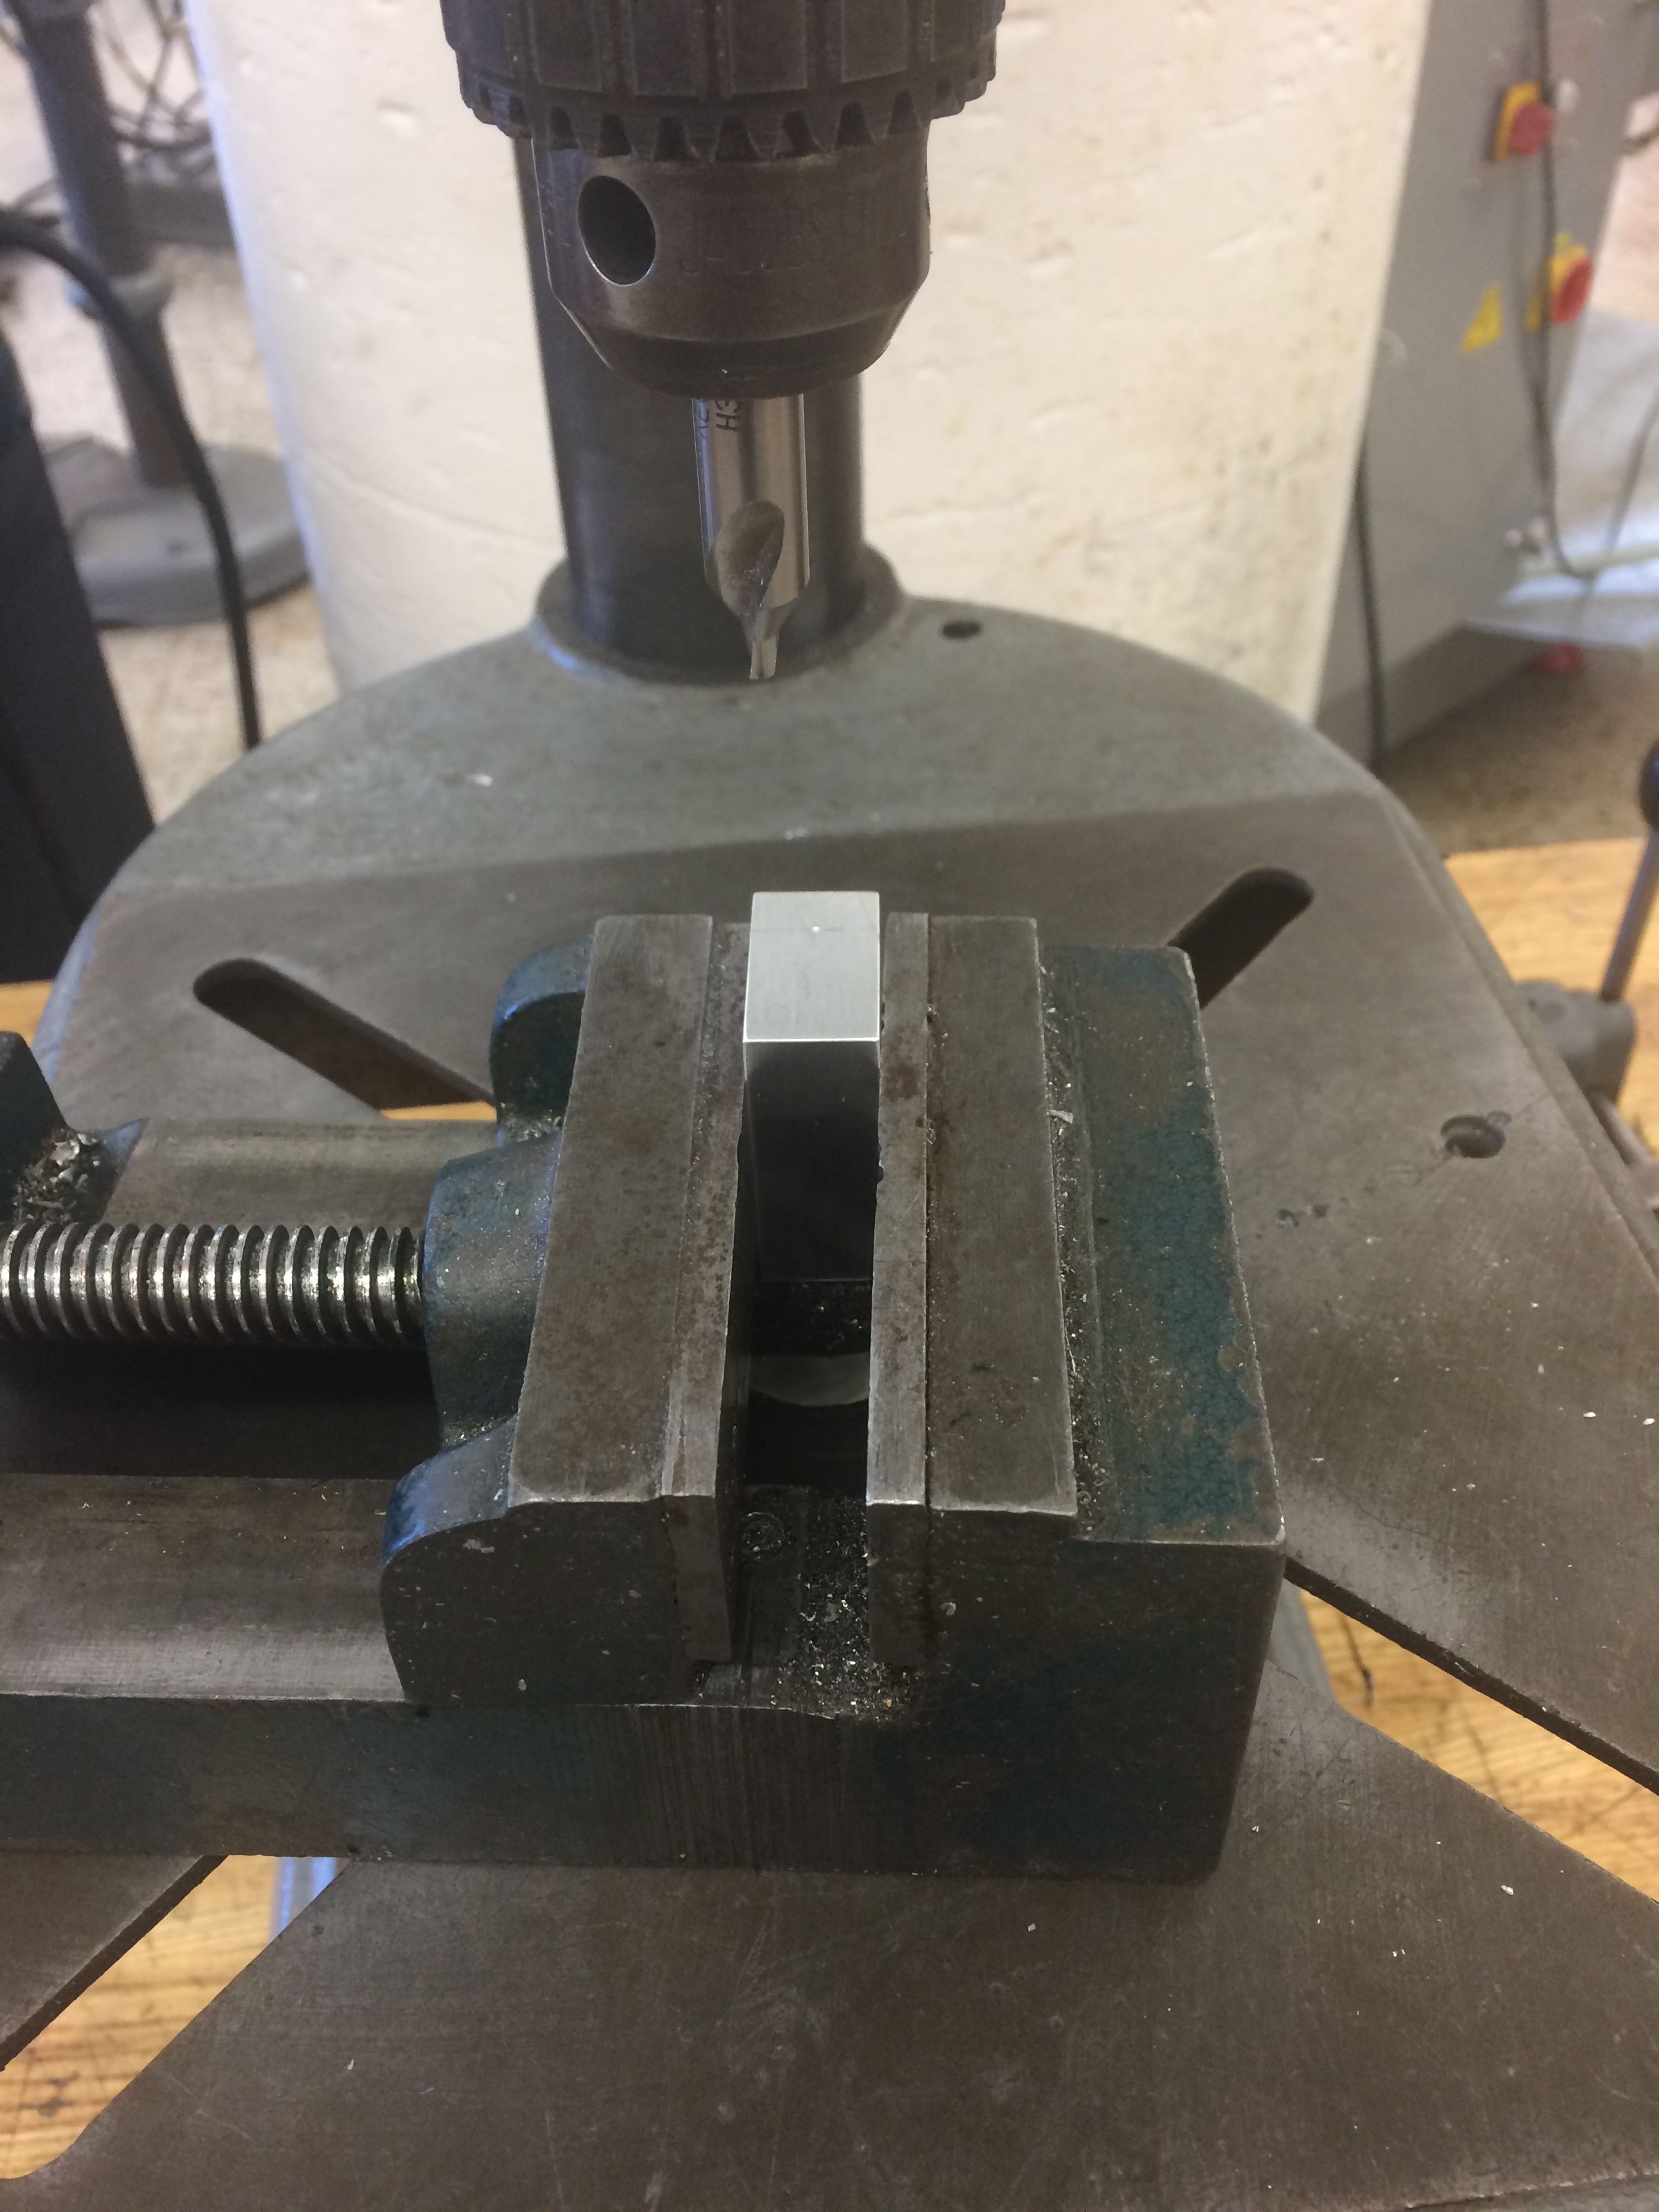
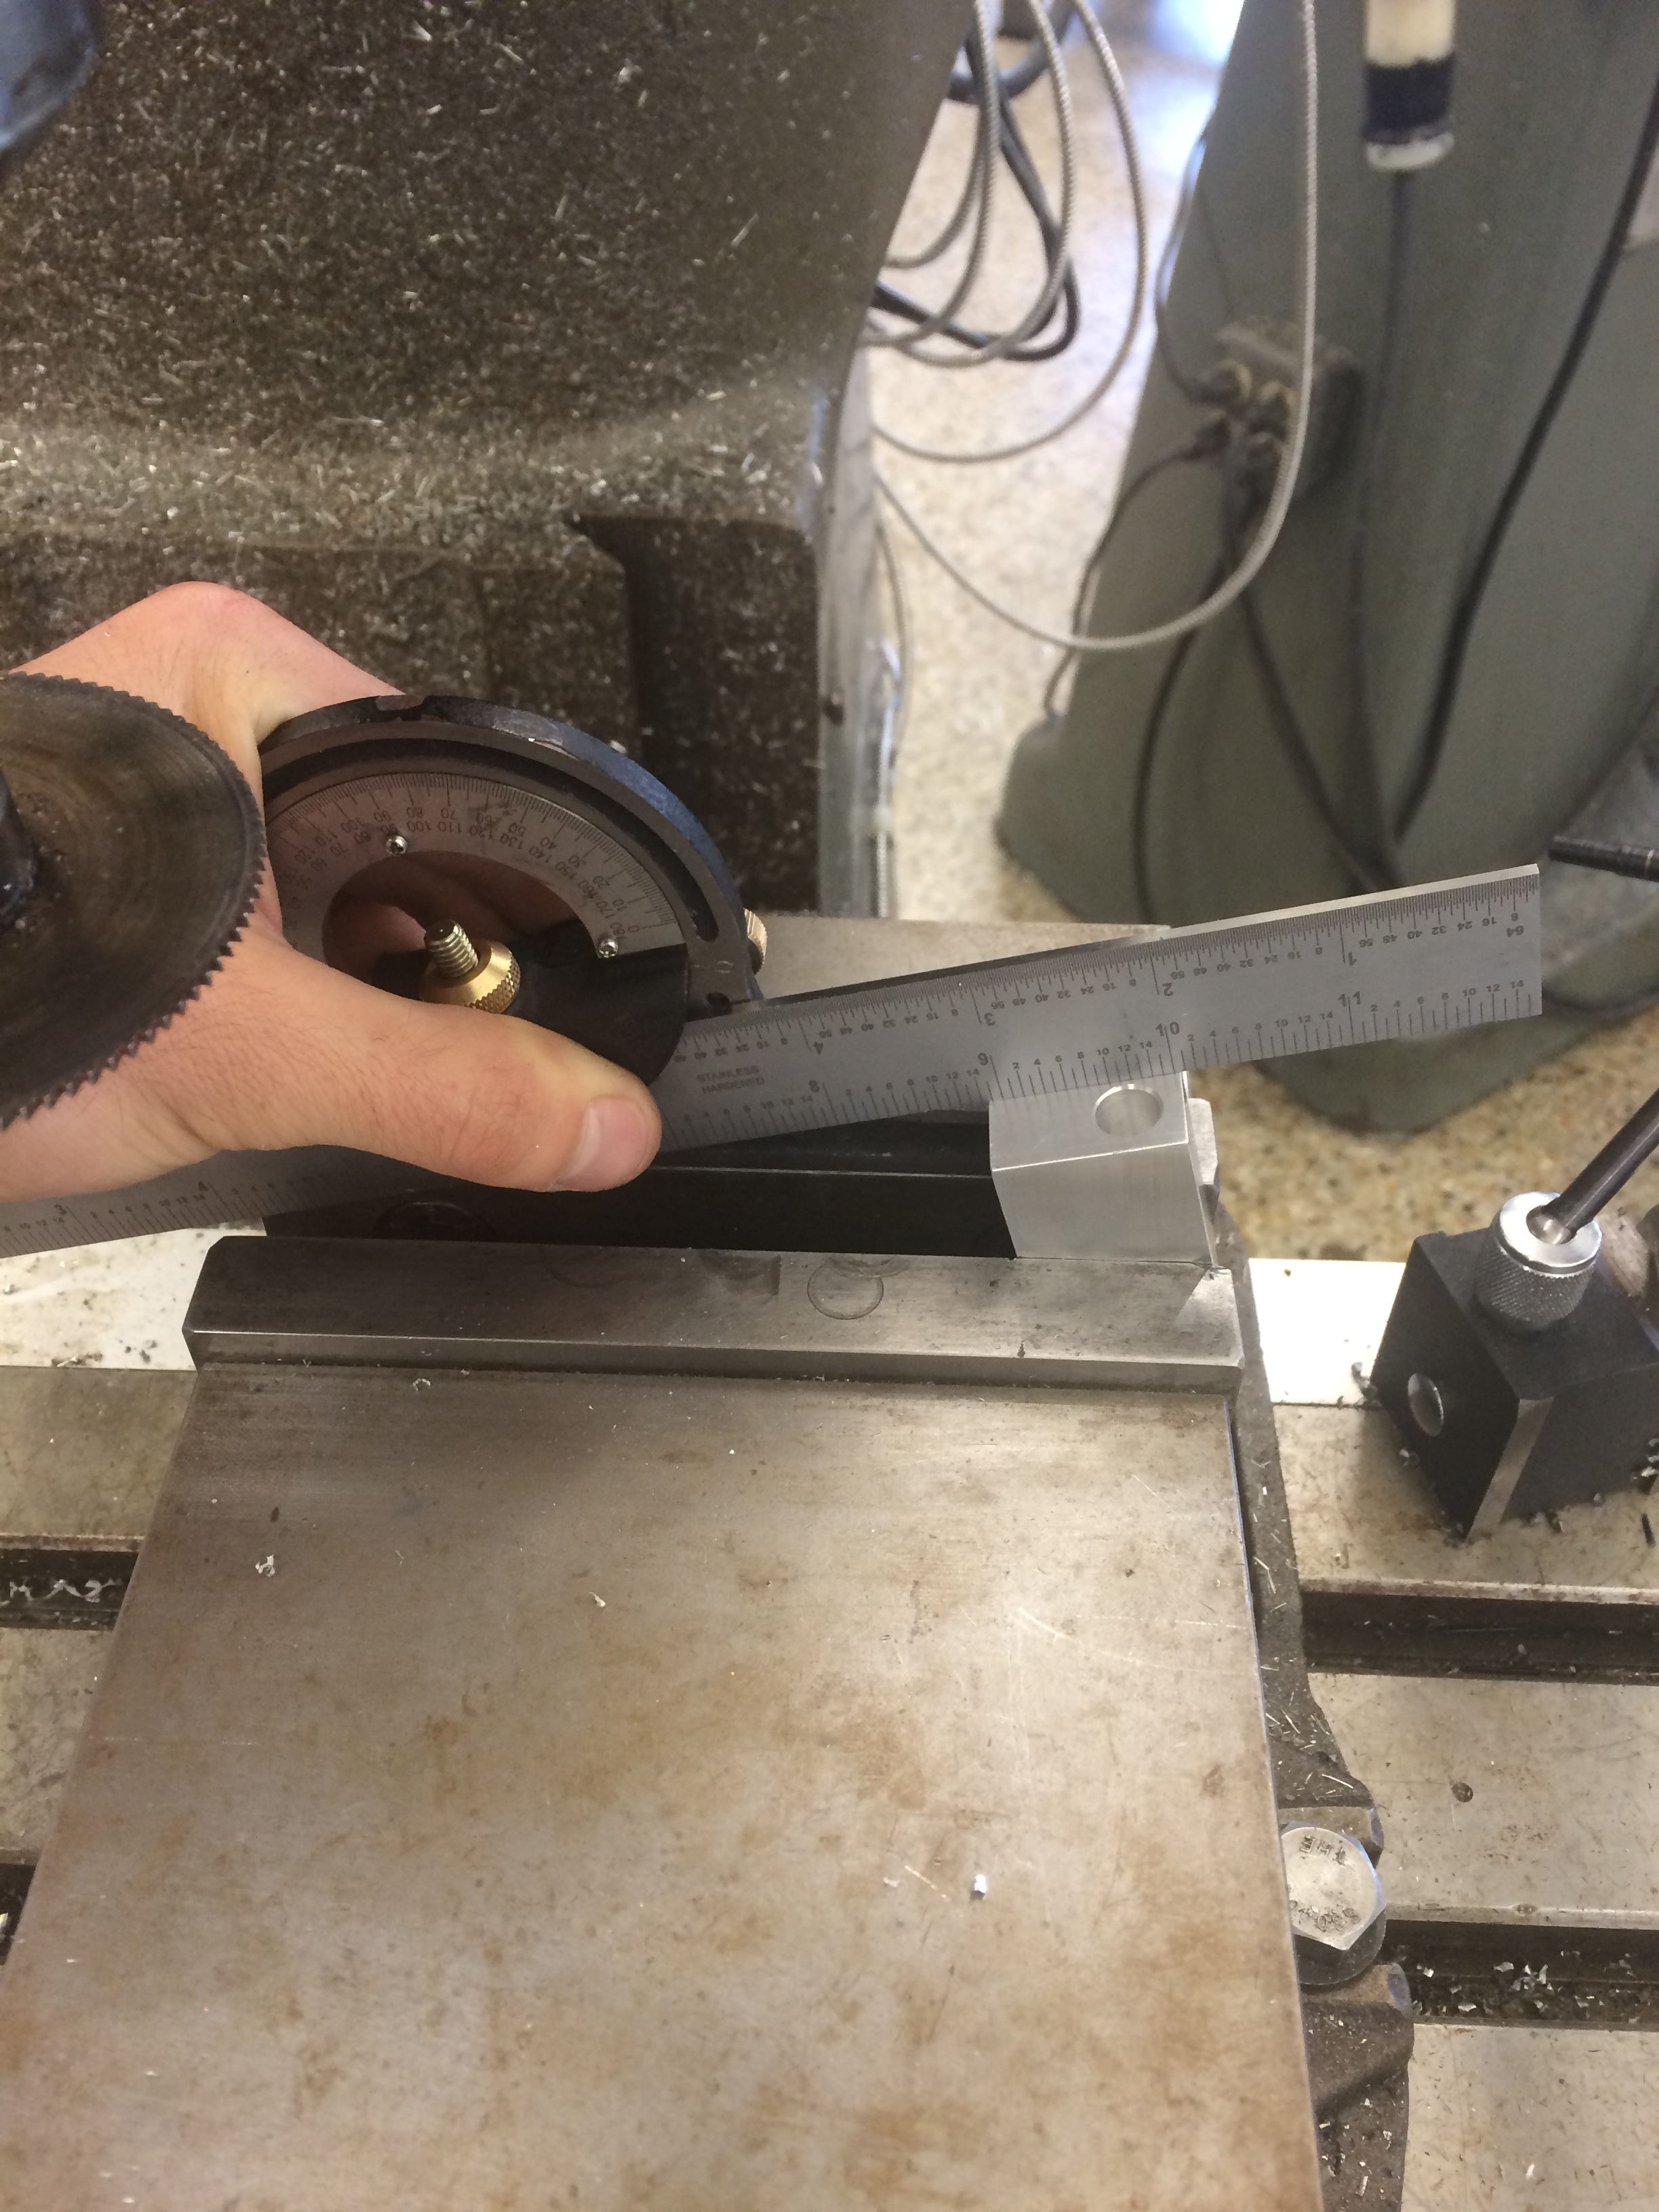
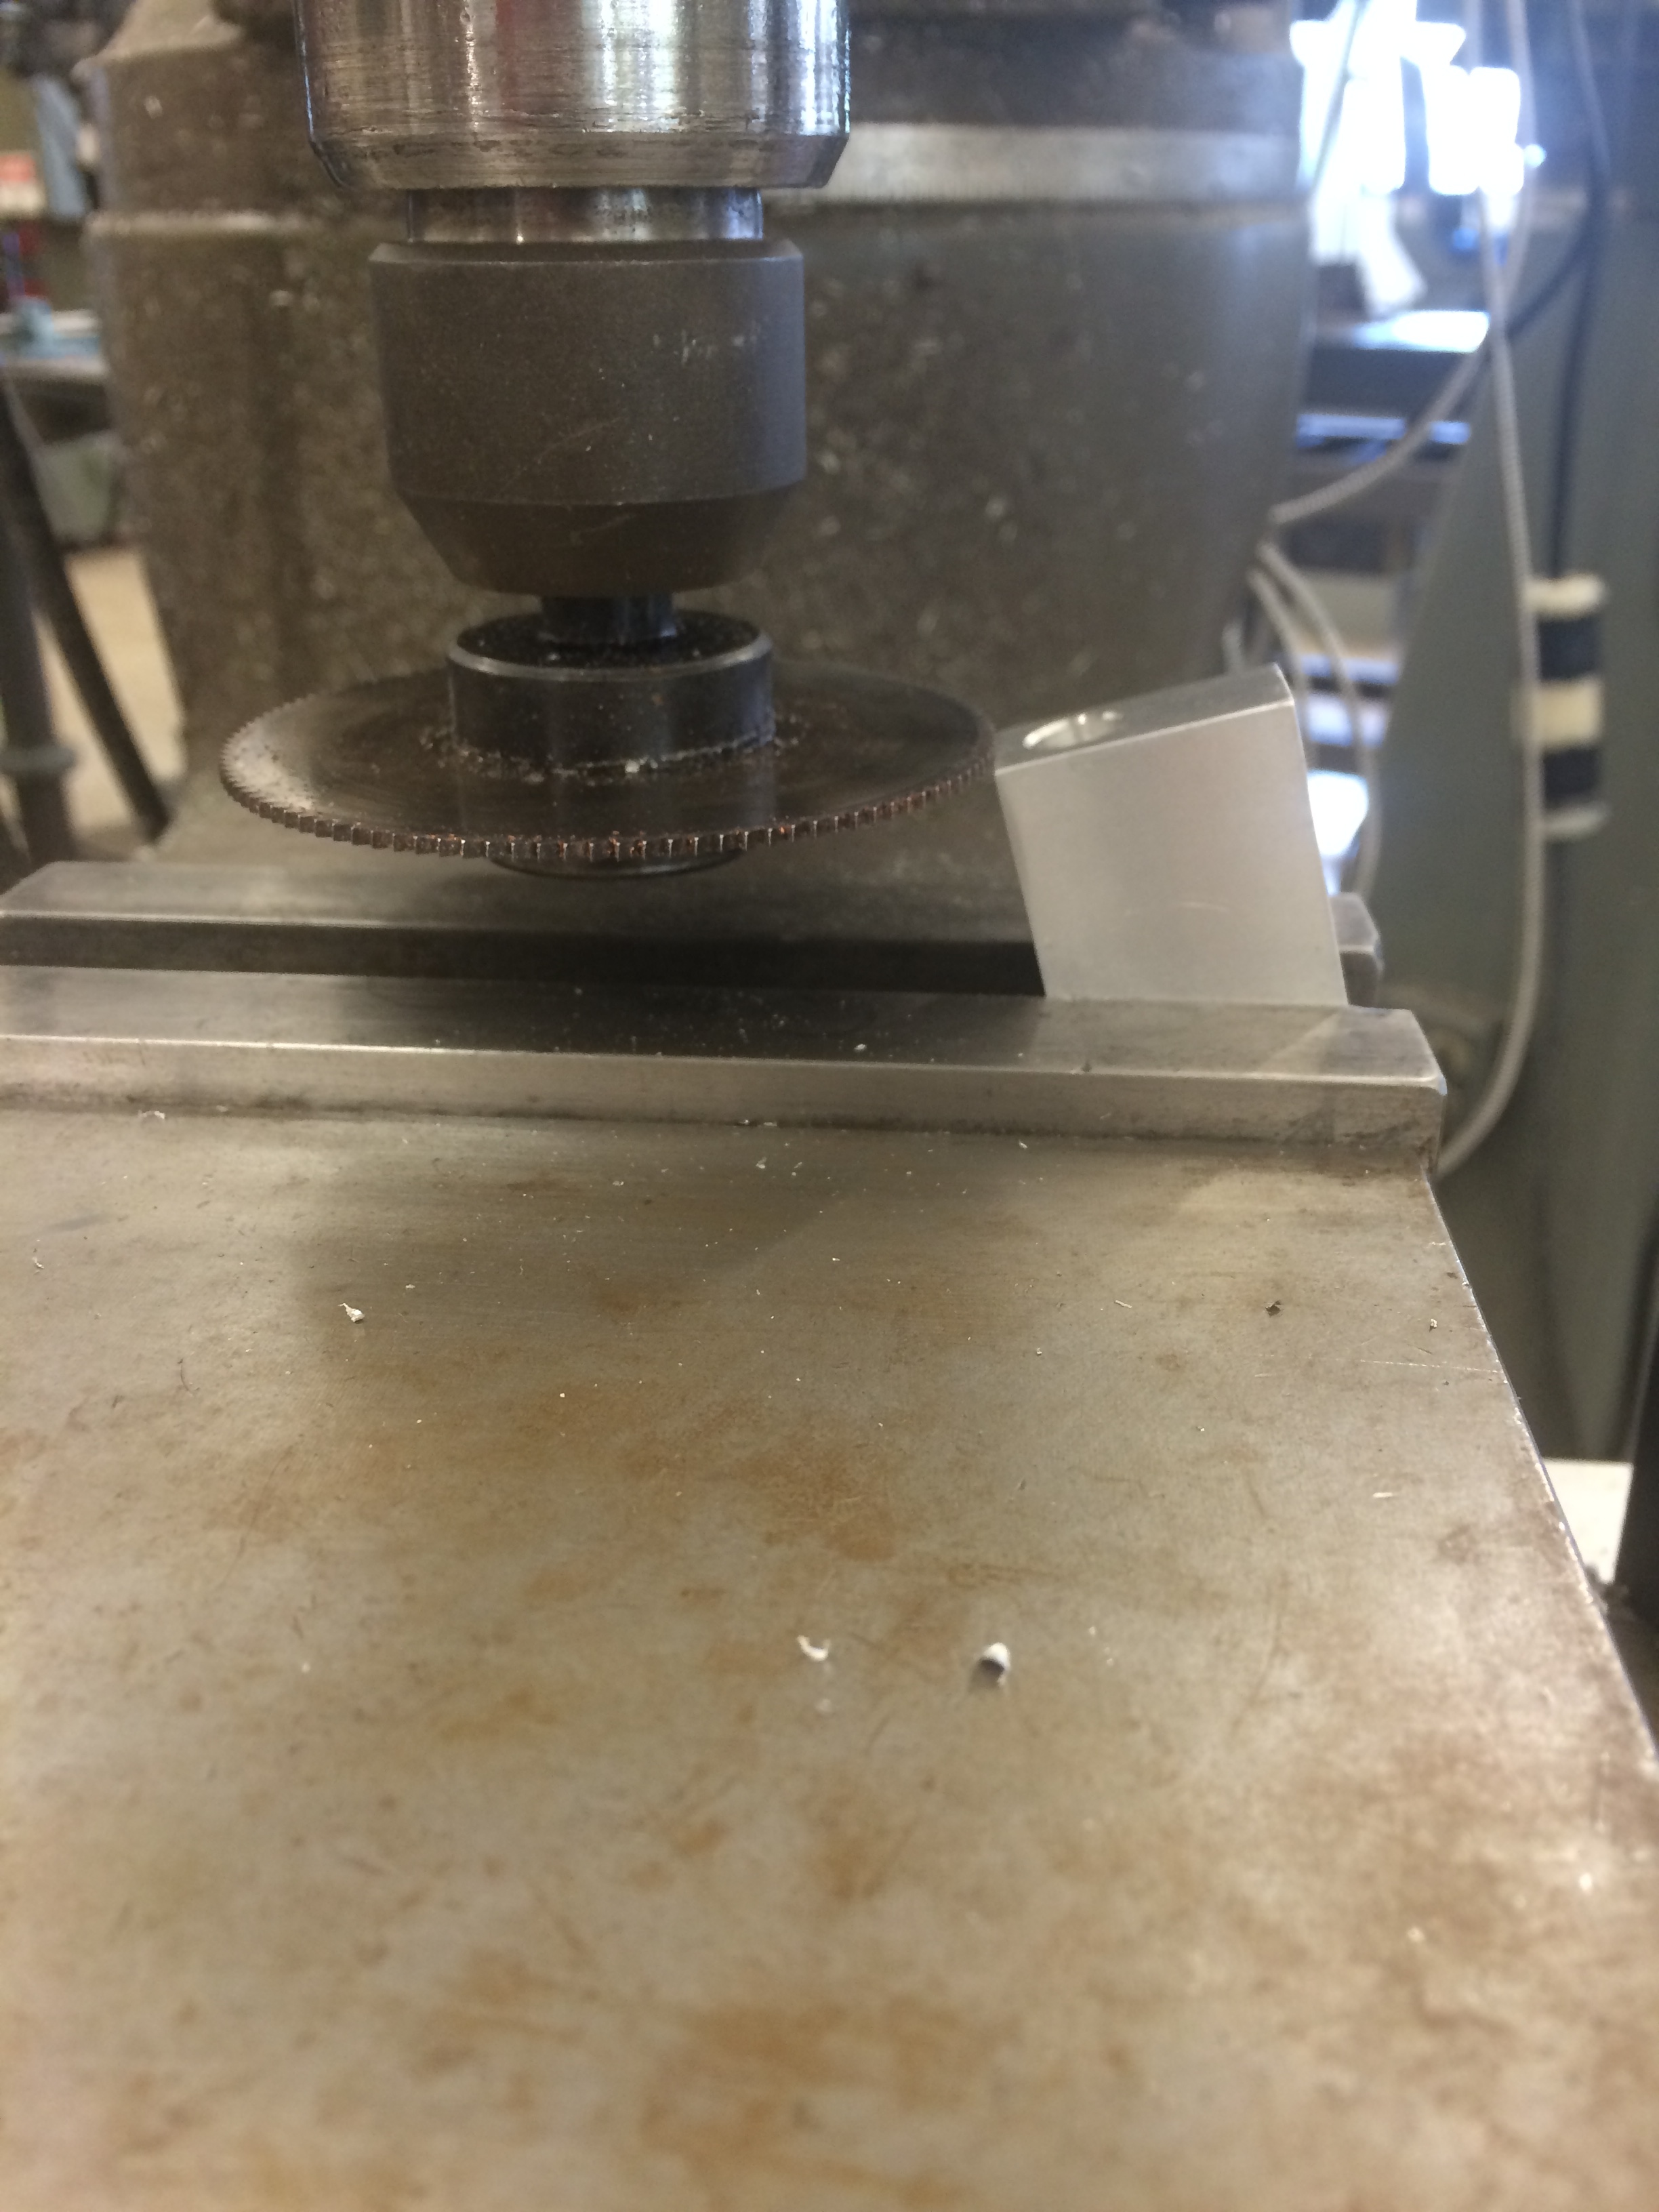
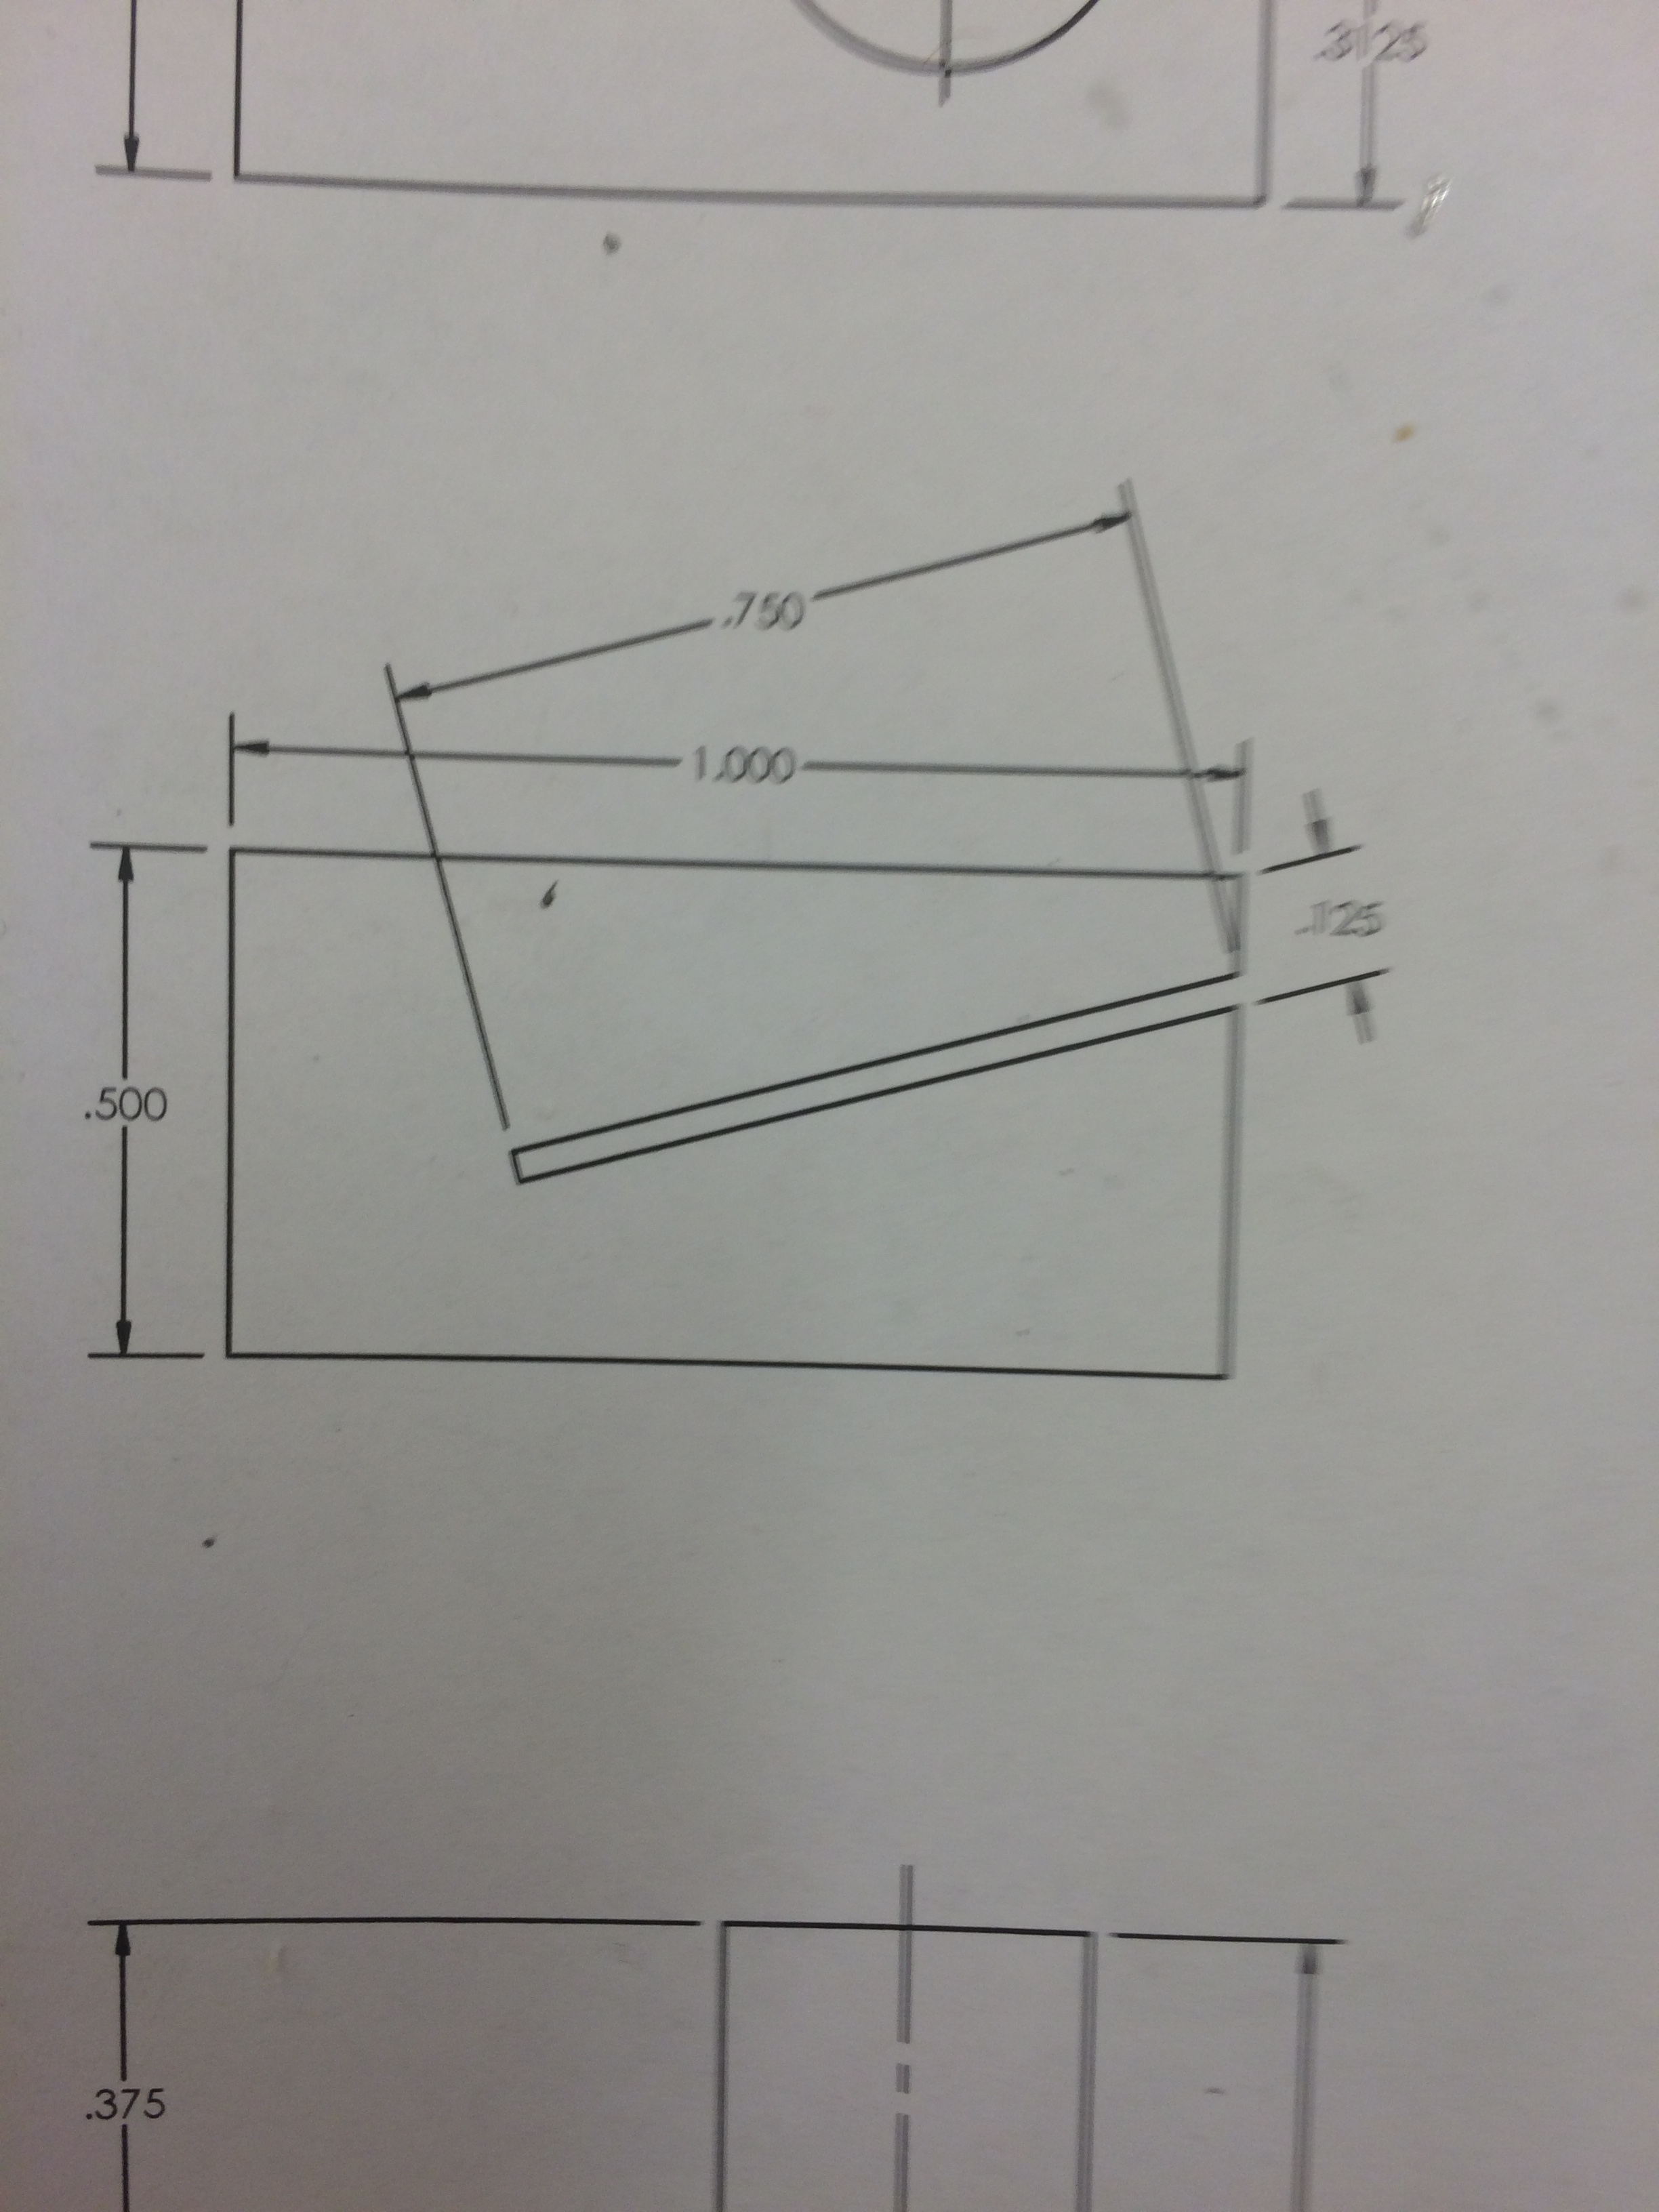
The die is a block of 6061 aluminum with a hole drilled and reamed to .376" and a slot cut with a slitting saw at a 15 degree angle. The angle allows the punch to cut through the paper gradually rather than all at once, reducing the force required by the user. 


The Punch

The punch is a cylindrical piece of tool steel turned to .375" on one side and .50" on the other. The .375" side cuts the photo, while the other side is larger to stop the punch from going all the way through and also for the user to grip. Now that I know this works, I can harden the steel. The sharp edge from turning is already starting to degrade even though I've only been cutting paper...

$\setCounter{0}$
In Personal Projects, Machining Projects, Illusionist's Locket Tags Machining
← BreakerBot Gets a New LookBreakerBot Wins an Award →

Blogpost Search

Blogposts by Category

Select Category
  • Academic Projects
  • Aviation
  • BreakerBot
  • Engineering Education
  • Illusionist's Locket
  • MATLAB Projects
  • Machining Projects
  • Personal Projects

Archive

  • May 2024
  • December 2019
  • November 2019
  • September 2019
  • April 2017
  • January 2017
  • August 2016
  • May 2016
  • April 2016
  • March 2016
  • February 2016
  • January 2016
  • November 2015
  • October 2015
  • June 2015
  • April 2015
  • February 2015
  • January 2015

Copyright © David Miller 2019