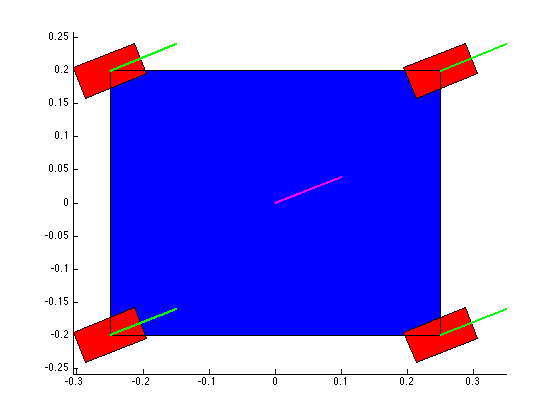
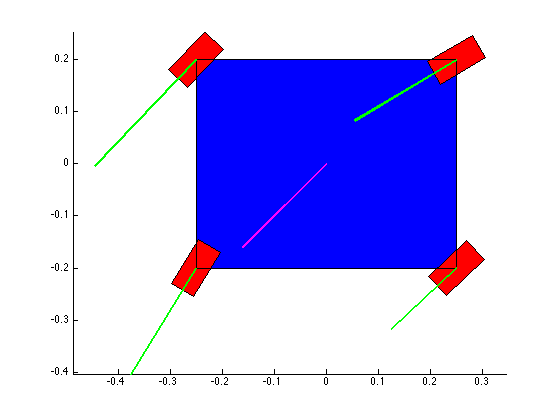
• Portfolio
  • Aviation
  • Blog
  • About
Menu

David S Miller

  • Portfolio
  • Aviation
  • Blog
  • About
 +Y translation + CW rotation. Notice the skidding. If the X vel. were +, the motion would be correct. I hadn't fixed the wheel angles at this point though; those are still wrong.

+Y translation + CW rotation. Notice the skidding. If the X vel. were +, the motion would be correct. I hadn't fixed the wheel angles at this point though; those are still wrong.

 Pure translation in Q1. Notice the X velocity still seems to have the wrong sign.

Pure translation in Q1. Notice the X velocity still seems to have the wrong sign.

 I don't remember what this is. I don't think it worked...

I don't remember what this is. I don't think it worked...

 This looks correct, but it's not. If you try gradually reducing the rotation and keeping the translation the same, you'll notice something wrong. It's helpful to test limiting cases like this, by introducing things very slowly. 

This looks correct, but it's not. If you try gradually reducing the rotation and keeping the translation the same, you'll notice something wrong. It's helpful to test limiting cases like this, by introducing things very slowly. 

 I stopped doing the motion plots and just did a single snapshot with velocity vectors. You have to adjust the sign of the wheel velocity to get the vector pointing in the right direction.

I stopped doing the motion plots and just did a single snapshot with velocity vectors. You have to adjust the sign of the wheel velocity to get the vector pointing in the right direction.

 Here you can see all the wheels have the same velocity [vector] as each other, and as the body of the robot. Bingo.

Here you can see all the wheels have the same velocity [vector] as each other, and as the body of the robot. Bingo.

 Here's where I started trying to combine translation inputs and rotation inputs. Here the robot has a Y+ translation and a CCW rotation. The net result is a pure rotation about some point on the X axis.

Here's where I started trying to combine translation inputs and rotation inputs. Here the robot has a Y+ translation and a CCW rotation. The net result is a pure rotation about some point on the X axis.

 Now I'm combining X and Y translation with rotations. I repeated this for different quadrants (translation) and different rotation directions (CW,CCW). 

Now I'm combining X and Y translation with rotations. I repeated this for different quadrants (translation) and different rotation directions (CW,CCW). 

 You can see that the lower left wheel is on the largest radius of the orbit, and it has the highest speed. Good sign.

You can see that the lower left wheel is on the largest radius of the orbit, and it has the highest speed. Good sign.

 I went through each translational quadrant twice, one for each rotation direction (CW,CCW). 

I went through each translational quadrant twice, one for each rotation direction (CW,CCW). 

 One other verification I could do is making sure the normal lines from each wheel intersect at the same point. This is the orbital point I mentioned in the text below. 

One other verification I could do is making sure the normal lines from each wheel intersect at the same point. This is the orbital point I mentioned in the text below. 

success_5.png
success_4.png
success_3.png
success_2.png
 +Y translation + CW rotation. Notice the skidding. If the X vel. were +, the motion would be correct. I hadn't fixed the wheel angles at this point though; those are still wrong.  Pure translation in Q1. Notice the X velocity still seems to have the wrong sign.  I don't remember what this is. I don't think it worked...  This looks correct, but it's not. If you try gradually reducing the rotation and keeping the translation the same, you'll notice something wrong. It's helpful to test limiting cases like this, by introducing things very slowly.   I stopped doing the motion plots and just did a single snapshot with velocity vectors. You have to adjust the sign of the wheel velocity to get the vector pointing in the right direction.  Here you can see all the wheels have the same velocity [vector] as each other, and as the body of the robot. Bingo.  Here's where I started trying to combine translation inputs and rotation inputs. Here the robot has a Y+ translation and a CCW rotation. The net result is a pure rotation about some point on the X axis.  Now I'm combining X and Y translation with rotations. I repeated this for different quadrants (translation) and different rotation directions (CW,CCW).   You can see that the lower left wheel is on the largest radius of the orbit, and it has the highest speed. Good sign.  I went through each translational quadrant twice, one for each rotation direction (CW,CCW).   One other verification I could do is making sure the normal lines from each wheel intersect at the same point. This is the orbital point I mentioned in the text below.  success_5.png success_4.png success_3.png success_2.png

Kinematics of Wheeled Mobile Robots Pt. 3

April 14, 2016

Our team finally got the robot moving and steering! Which means it's finally time for me to start the implementation process of the kinematic and control equations. To further verify and help prepare for the implementation, I made a little simulator in MATLAB to help visualize how the robot will move given certain (steady state) commands. Transient commands are a whole other issue, which I may discuss later. 

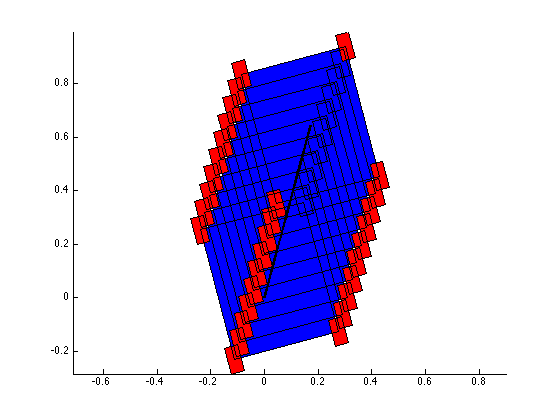
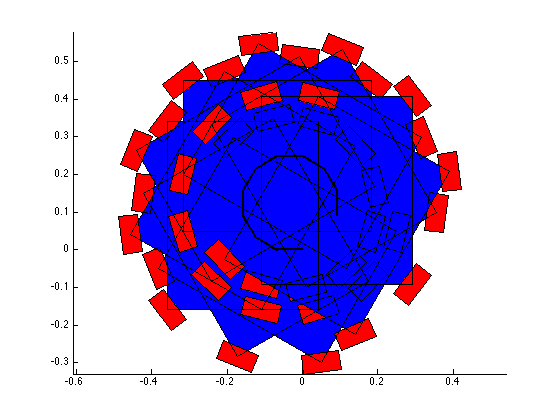
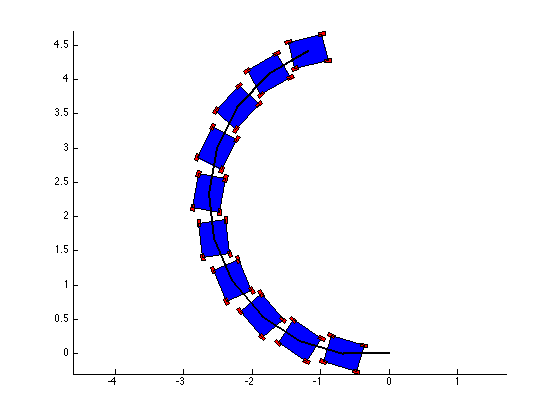
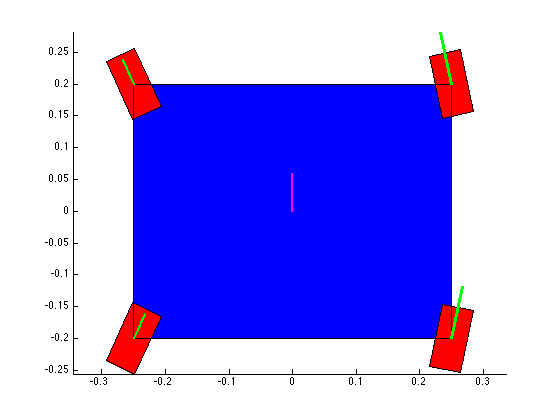
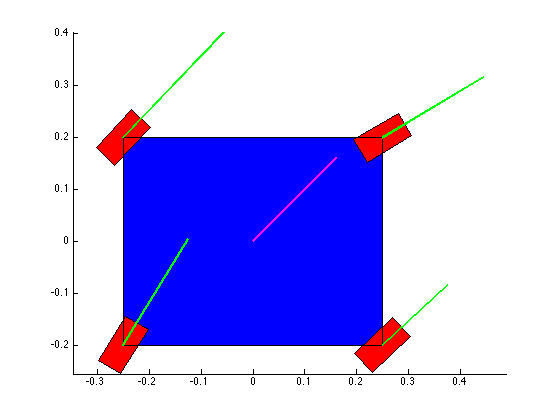
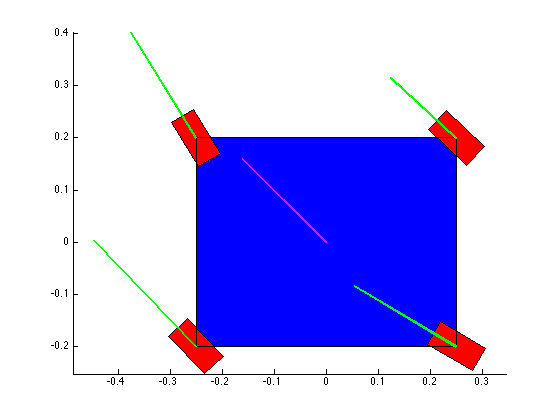
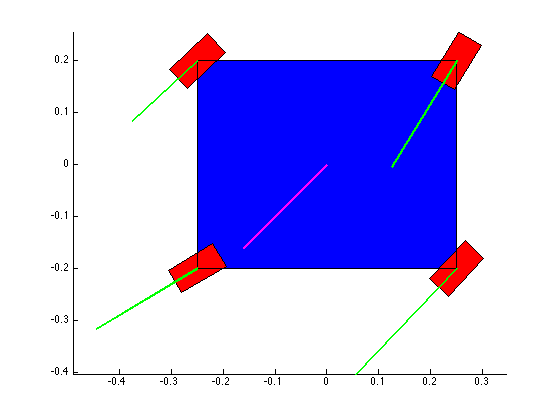
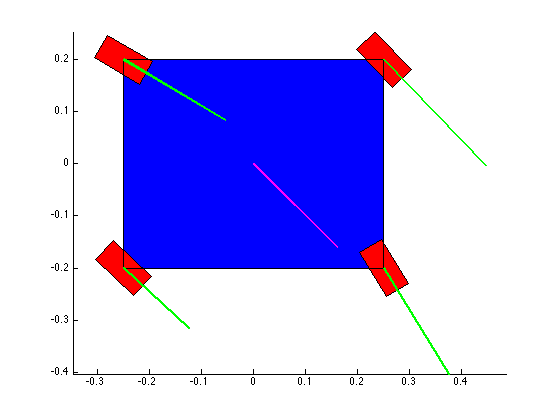
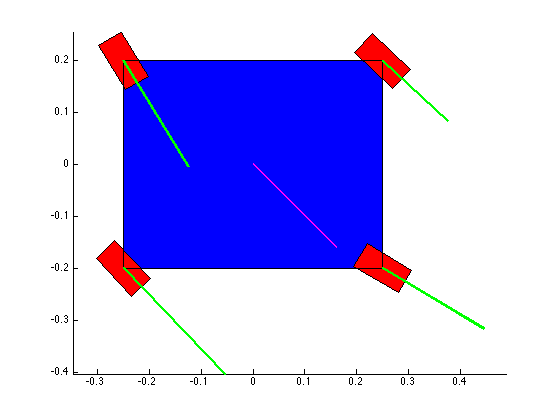
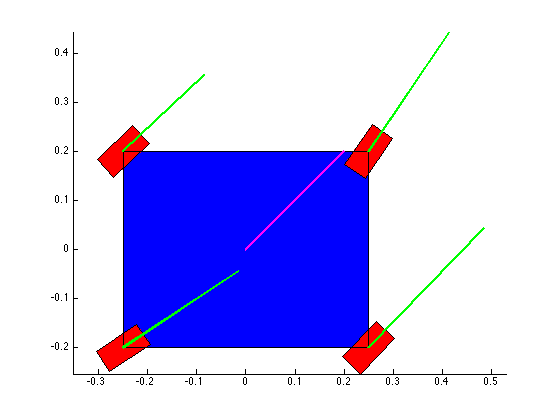
The structure of the top level code is simple. It defines the parameters of the robot and of the simulation, and calls the swerve_command function. This function performs the inverse kinematics and spits out the wheel angles and speeds, as well as the position (x, y, theta) information for that time step. Over several time steps, the robot will move. If steady state inputs are held, the wheel angles and speeds will remain constant, even if the robot itself is executing some curvilinear motion. The robot is plotted at each time step. To verify the wheel angles are correct, you need to visually confirm that the wheels are tangent to the path taken by the wheels in each snapshot. 

Confirming the wheel speeds is more difficult. For any type of pure translation all the wheel speeds just need to be the same. This has been confirmed. If there is any type of rotation involved, the wheels will orbiting some central point. If the location of the point is known, then the radius to each wheel can be found and using the omega = v/r equation you can confirm that all the angular speeds about that central point are equal. This is hard to do currently because we are normalizing all our speeds because they are simply throttling values which will be sent to the motors. We do not know exactly what speeds they will spin at. However, the ratios of the speeds are telling. What we know is that the wheels on the largest radius of the orbit must have the highest linear velocity, and the wheels on the smallest radius of the orbit must have the smallest linear velocity. This allows all the wheels to have the same angular velocity around that central point. As you can see from the photos, this phenomenon is evident by the colored velocity vectors. 

There is something funky going on with the way that the motion of the robot is plotted. The wheel angles and speeds look okay, but when I try to plot the motion some of the components of the motion (X and rotation) have the wrong sign and it looks like the robot is skidding across the floor. I haven't been able to figure out why that is yet. I have a feeling it's some kind of sign error but I haven't found it yet.


Open Issues:

  1. Figuring out how to update the wheel speeds and angles while moving (transient command inputs)

  2. Normalizing the wheel speed outputs to prevent speed commands to the motor from saturating

  3. Finding the little sign errors that are messing things up


Bonus:

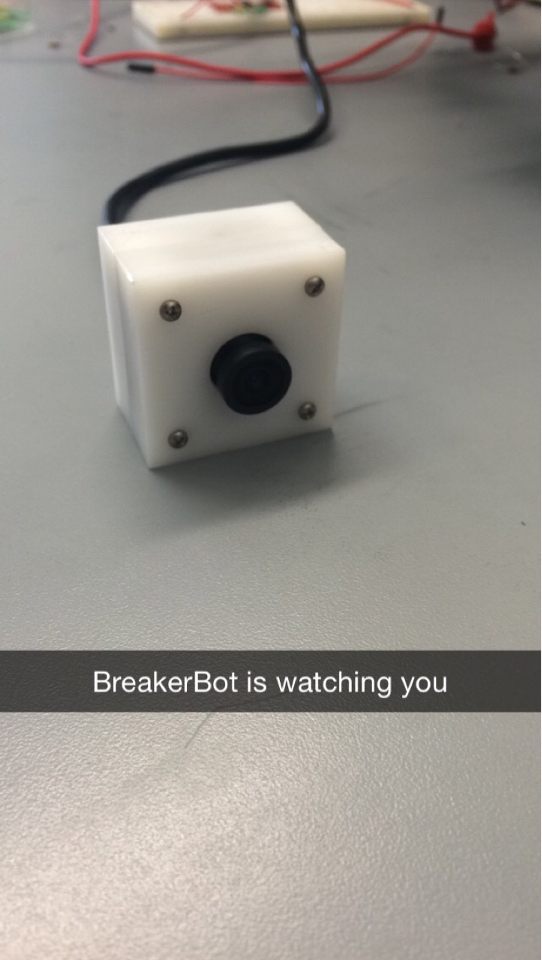
We also made a little case for the webcam BreakerBot will be using for the First Person View mode for remote operation. BreakerBot is watching you...

$\setCounter{0}$
In Academic Projects, BreakerBot, MATLAB Projects Tags MATLAB, kinematics, Modeling
← Quantum Dot Lite Brite Pt. 2MATLAB Project: String Vibration →

Blogpost Search

Blogposts by Category

Select Category
  • Academic Projects
  • Aviation
  • BreakerBot
  • Engineering Education
  • Illusionist's Locket
  • MATLAB Projects
  • Machining Projects
  • Personal Projects

Archive

  • May 2024
  • December 2019
  • November 2019
  • September 2019
  • April 2017
  • January 2017
  • August 2016
  • May 2016
  • April 2016
  • March 2016
  • February 2016
  • January 2016
  • November 2015
  • October 2015
  • June 2015
  • April 2015
  • February 2015
  • January 2015

Copyright © David Miller 2019